Blog

  • Systeme.io Setup Guide 2026: Configure These Settings First or Your Emails and Payments Will Break

    What Are Systeme.io Account Settings and Why Do They Matter

    Systeme.io account settings are the back-end configurations that control how your entire account behaves. They determine who your emails appear to come from, when your automations fire, what currency shows on your payment pages, and what information appears on your customer invoices.

    They are not cosmetic options. They are infrastructure.

    Most beginners skip them entirely. They create an account, watch a funnel-building tutorial, and start building immediately. The first time I built inside Systeme.io I did the same thing. My welcome email went out with the wrong sender name and my automated sequence fired at the wrong time for three days before I traced it back to a timezone I had never touched. The settings stay at their defaults. This works fine until the first email goes out with the wrong sender name, the first automation fires at 3am, the first payment page shows USD to a UK customer, or the first invoice goes out with incomplete business information.

    At that point the fix is not just changing a setting. It is going back through everything already built and correcting the downstream effects.

    The correct approach is to configure the settings first and build second. This article documents every settings section inside Systeme.io, what each one does, which ones need your attention before you build anything, and which ones you can safely return to later.

    New to Systeme.io and not sure if it is the right tool for you yet? Start here: the Start Building page covers what Systeme.io does, what the free plan actually includes, and how it fits into the correct setup order alongside your domain and email platform.

    Watch the companion video: Systeme.io Setup Guide 2026, Do This FIRST or Your Emails and Payments Will Break, available on the LaunchWithDavid YouTube channel or watch it below.


    Do You Have This Problem? Diagnose Your Setup

    Observable symptoms and what they mean:

    Your emails are going to subscribers with the wrong sender name. Your default sender name in Email Settings has not been configured. Every email sent from your account is using the platform default. Go to Setting 5 in Section 4 of this article.

    Your automated emails are firing at the wrong time. Your timezone in Account Settings is set incorrectly. An automation set for 9am is firing based on the wrong timezone. Go to Setting 2 in Section 4 of this article.

    Your payment pages are showing the wrong currency. Your default currency in Payment Settings has not been set. Every new price plan is defaulting to USD regardless of your location. Go to Setting 4 in Section 4 of this article.

    Your customer invoices have incomplete or incorrect information. Your profile has not been fully completed. Invoice data is pulled directly from profile settings. Go to Setting 1 in Section 4 of this article.

    Your emails are landing in spam despite having DNS records in place. Your sender domain may not be authenticated correctly, or your sending domain is not resolving to a live webpage. Go to Setting 5 in Section 4 of this article.

    Your Stripe or PayPal checkout is not complete. Required fields are missing from your order form and the buy button spins without processing. Go to Setting 8 in Section 4 of this article.

    You have hit a wall with automation and you are on the free plan. You have used your one automation rule allowance and need to upgrade or restructure. Go to Setting 3 in Section 4 of this article.

    If none of these symptoms match your situation and you are setting up for the first time, continue reading from the top. You are in the right place.


    What Causes Systeme.io Setup Failures

    These are the most common causes of problems in a Systeme.io account. Most setup failures are not caused by the funnel builder or the email tool. They are caused by back-end settings that were never configured before building started.

    1. Timezone left at default. Systeme.io ships with a default timezone that is almost certainly not yours. Every scheduled email and automation sequence fires based on whatever timezone is set here. Leave it wrong and your entire email infrastructure operates on the wrong clock.
    2. Sender email not confirmed. Systeme.io requires you to verify your sender email address via a confirmation link before it will send emails on your behalf. Many users set the address but never click the confirmation link. Emails either fail to send or revert to a default unverified address.
    3. Sender domain not authenticated. Without CNAME and DMARC records added to your DNS, Systeme.io emails bypass authentication checks and land in spam. This is not a deliverability preference. It is a technical requirement that Google, Yahoo, and Microsoft all enforce.
    4. Sending domain not resolving to a live page. In 2026, ISP spam filters check whether the domain used for email sending has an active homepage. A domain pointing to a 404 error or a coming soon page signals low reputation to those filters before authentication records are even evaluated.
    5. Default currency not set. Systeme.io defaults to USD. If you are not a US-based seller, every price plan you create will require a manual currency correction unless you set the default in Payment Settings first.
    6. Profile not completed before first sale. Customer invoices are generated automatically using the information in your profile. An incomplete profile means invoices go out with missing or incorrect business details. This cannot be retroactively fixed on invoices already sent.
    7. Payment gateway fields missing from order forms. Each payment gateway has specific required fields that differ from one another. Stripe requires a Postal Code and Phone Number field on order forms. If those fields are absent the checkout fails silently. The buy button spins, no error appears, and no sale completes.
    8. Free plan automation limit reached mid-build. The free plan includes one automation rule. Most builders hit this wall before they reach anywhere near the 2,000 contact limit. Hitting it mid-project means either upgrading immediately or restructuring automations already built.

    Section 4: The Full Settings Walkthrough

    How to access Systeme.io settings: Log into your Systeme.io account. Click on your profile picture or avatar in the top right corner of the dashboard. Select Settings from the dropdown menu. The settings are listed in a sidebar on the left. Work through them in the order they appear. This guide follows that same order.

    Account setup

    Priority Matrix

    PrioritySettingWhy it matters
    ImmediateProfile and timezoneAffects invoices and automation timing. Wrong here means wrong everywhere.
    CriticalEmail and DMARCPrevents emails from hitting the spam folder. Cannot be skipped.
    StructuralCustom domainEssential for professional branding and email deliverability reputation.
    OptionalCourses and shippingOnly needed when launching those specific product types.

    While the table above gives you the what, the priority sections below are the why. If you are coming over from the YouTube channel, these are the big four that I constantly see breaking people’s setups. I have documented all of this from building it myself, not from a demo account. Let us get these right first so you do not have to rebuild later.


    Setting 1: Profile, Do This First

    The first setting to complete is your profile. Everything you enter here is used to generate customer invoices automatically. If you fill it in incorrectly now and make a sale before fixing it, your invoices go out with the wrong information.

    Fill in every field: profile image, display name, first name and last name, country, city, address, postal code, state or region, and phone number.

    At the bottom of the profile section you will see a Customer Type field. Select Individual if you are operating as a person. Select Company if you have a registered business. Most people starting out will select Individual. This distinction matters for legal compliance because invoices generated by Systeme.io will reflect whichever you choose, and changing it after your first sale means correcting existing invoice records.

    Note on your email address: The email shown in your profile is the email associated with your Systeme.io login account. Use your business email here if you have one, not a personal Gmail. Your sender email for outgoing emails to subscribers is configured separately in Setting 5 below.

    Click Save before moving on. Systeme.io does not auto-save.


    Setting 2: Account, Set Your Timezone Now

    The Account settings section controls your timezone, date format, and time format.

    Systeme.io uses your timezone to determine when scheduled emails are actually sent. If your timezone is wrong, an email you schedule to go out at 9am will fire at the wrong time, potentially in the middle of the night for your audience. This affects every automated email sequence and every scheduled broadcast you send from this account for as long as the setting stays wrong.

    Set your timezone to your actual timezone now. Do not leave it at the default.

    The date format and time format settings are personal preference. Pick whatever you are used to reading, save, and move on.

    Why this matters downstream: When you build your funnel and set up your email automation sequence, every scheduled email fires based on the timezone set here. Get this right before you touch any automation.


    Setting 3: My Plan, Know Your Limits Before You Build

    The My Plan section shows which plan you are on and what your current limits are. Nothing to configure here, but understanding your limits before you start building means you do not hit a wall mid-project.

    What the free plan includes:

    Contacts: 2,000 Sales funnels: 3 Automation rules: 1 Custom domains: 1 Courses: 1 Email sending: Unlimited File storage: Unlimited Course students: Unlimited Transaction fees: 0% Built-in affiliate program: Included Credit card required: No

    The hidden limit most people hit first: The 1 Automation Rule on the free plan is the real reason most builders upgrade, not the contact limit. You can hit this wall with fewer than 50 contacts. The moment you want a second automated sequence running simultaneously you are already beyond what the free plan allows. Keep this in mind as you build because it is the first wall and it catches people off guard.

    Paid plan options:

    Startup: $170 per year, 5,000 contacts, unlimited funnels

    Webinar: $470 per year, 10,000 contacts, unlimited funnels plus webinar funnels

    Unlimited: $970 per year, unlimited contacts, unlimited funnels plus sub-accounts

    Start with the free plan, learn the platform, and upgrade when you actually hit a limit. There is no reason to pay for features you are not using yet.


    Setting 4: Payment Settings, Configure Before You Connect a Gateway

    The Payment Settings section controls how your payment pages behave globally, meaning every product and order form you create inherits these settings. Work through them before connecting any payment gateway.

    Receipt Settings

    By default Systeme.io sends customers an automatic receipt after purchase. Leave the default on unless you are handling receipts through a separate system. For most beginners this is one less thing to manage.

    Tax Settings

    If you do not charge VAT, check the box that says you do not charge VAT to customers on payment pages. This removes the VAT field from your order forms. If you do charge VAT, configure that separately within this section. If you are unsure whether you need to charge VAT, check with an accountant before your first sale. This is not something to guess at.

    Default Currency

    Set this to your currency. This becomes the default every time you create a new price plan inside Systeme.io. If you leave it at USD and you are based in the UK or Australia, you will be manually changing the currency on every single product you create. Set it correctly here once and it is handled automatically going forward.

    Access Settings for Subscriptions and Payment Plans

    This controls when customers get access to what they have purchased, either immediately on payment or on a delay. Leave this at the default for now and revisit when setting up your first product. You will have the context to make the right decision at that point.

    Terms and Conditions

    This is where you paste the terms and conditions that appear on all your payment pages. If you do not have these written yet, skip it for now and come back before your first product goes live. When you do add them they will automatically appear across all your payment pages and you will not need to add them individually to each one.


    Setting 5: Email Settings, One of the Most Important Steps in This Entire Setup

    The Email Settings section is where you set your sender name, sender email address, and authenticate your domain for email sending. This is not optional and it is not something to come back to later.

    What needs to happen in this section:

    Your sender name is what subscribers see as the from name on every email you send. Set this to your name or your brand name, not a placeholder.

    Your sender email address must be a custom domain email, not a Gmail or Yahoo address. It must also be confirmed via a verification email that Systeme.io sends to that address. Many users set the address and never click the confirmation link. If the address is not confirmed, emails either fail to send or revert to an unverified default.

    You must authenticate your sending domain with CNAME and DMARC records in your DNS.

    Warning: If you skip email authentication your emails will go to spam. This means every email you send, including welcome emails and automation sequences, will land in spam folders or not arrive at all.

    2026 Spam Complaint Threshold: This Is Now a Hard Requirement

    In 2026, keeping your spam complaint rate below 0.3% is no longer a suggestion from Google, Yahoo, and Microsoft. It is an enforced threshold. If you hit it, no amount of authentication will recover your deliverability. Before you send your welcome email to any real subscribers, send a test to a personal inbox first. Confirm it lands in the primary inbox and that everything looks correct. Do this every time you set up a new campaign.

    Because the email authentication section has its own full DNS setup process, I have made a dedicated video and article that walks through every step.

    Go here next (opens in new tab): Systeme.io Emails Not Sending or Going to Spam? Fix It With Hostinger DNS. Article 1 in this series covers the complete email authentication process step by step.

    Do not skip this. Complete the email authentication before building your funnel. Your welcome email will not reach anyone if this is not done first.

    One important note: if your sender email domain and your custom funnel domain are the same domain, you will be adding DNS records for both in the same session. The CNAME records for email authentication and the CNAME records for your custom domain both go into the same DNS zone editor. Setting 7 covers the custom domain connection. Work through both settings before you open your DNS editor so you can add all the records in one go.


    Setting 6: Courses Settings

    The Courses settings section controls how your course looks and behaves for students, including student session storage and audio or video download permissions. Leave at the default for now and come back when setting up your first course.


    Setting 7: Custom Domains, Connect Your Domain and Make Sure It Resolves to a Live Page

    The Custom Domains section is where you connect your own domain name to Systeme.io so your pages and funnels show yourdomain.com instead of a Systeme.io subdomain link.

    By default Systeme.io gives you a free subdomain in the format yourname.systeme.io. This works for testing but is not what you want on a real business funnel.

    Use the free subdomain while you are learning the platform and testing your funnel structure. Switch to your custom domain before you send any real traffic to your pages. The free subdomain has no authentication records tied to your business domain, which means emails sent from a free subdomain address carry less deliverability weight than emails sent from your own authenticated domain.

    To add your custom domain, click Add Domain and enter your domain with the www prefix included. The DNS setup that follows depends on which registrar you bought your domain from.

    Important: After adding DNS records it can take up to 48 hours for changes to propagate across the internet. If your domain does not show as connected immediately that is normal. Do not panic and do not add the records a second time.

    2026 Deliverability Note: Your Domain Needs a Live Page

    In 2026, ISP spam filters check whether the domain you are sending email from actually has a live homepage. A domain pointing to a 404 error or a coming soon page signals low reputation to those filters before your authentication records are even evaluated. As soon as you connect your domain to Systeme.io, point it to a live page. Even a simple Systeme.io landing page is enough because the domain just needs to resolve to something real.

    Using Hostinger? I have made a dedicated article and video covering the exact DNS records required, including 2 CNAME records, 1 ALIAS redirect, and 10 CAA records, with screenshots of every step inside the Hostinger DNS zone editor.

    Read it here (opens in new tab): How to Connect a Hostinger Domain to Systeme.io. Article 2 in this series.

    If you are using GoDaddy or another registrar, Systeme.io has help documentation for each one. The records are the same and only the interface for adding them differs.


    Setting 8: Payment Gateways, Set Up Before You Build Your First Product

    The Payment Gateways section is where you connect the payment processor that handles transactions from your customers. You need at least one connected before you can sell anything through Systeme.io.

    Available options:

    Stripe: the most widely used option, available in most countries.

    PayPal: widely recognised and trusted by buyers.

    Razorpay: for sellers based in India. Paystack: for sellers based in Africa.

    Warning: Missing required fields cause silent payment failures. The most common culprit is the Postal Code field and the Phone Number field. Stripe requires both on the order form. If your Systeme.io order form does not include them, the checkout fails silently. The buy button spins, no error appears, and no sale completes. Check your order forms against your gateway requirements before going live.

    Stripe and PayPal setup guides are coming in dedicated videos and will be linked here when published.


    Setting 9: Remaining Settings, What They Do and When You Need Them

    These settings are not needed immediately. Here is what each one does and when to return.

    Sales Funnels Settings: Global funnel defaults. Come back when building your first funnel.

    Shipping Settings: Relevant only for physical products. Skip entirely if selling digital products or services.

    Affiliate Program: Configure your own affiliate program here when you are ready to recruit affiliates.

    Public API Keys: For developers connecting third-party tools via API. Skip unless you know you need it.

    Webhooks: Advanced integrations sending data to external systems. Skip for now.

    Integrations: Connect Zoom, Google Meet, Google Sheets, ActiveCampaign, Google Calendar, and Twilio. Return when setting up a specific integration.

    Affiliate Commission Payouts: How your affiliates receive payments. Revisit when your affiliate program is active.

    Notifications: Which email alerts Systeme.io sends you. Look through this and turn off anything that generates noise you do not need.

    Workspace Members: Add team members with defined access levels. Skip if working solo.

    Security: Two-factor authentication lives here. It is on by default. Check Trust This Device on your own machine to skip the code on repeat logins from that device. Leave 2FA on if you are taking payments because it protects your account and your customers data.

    Manage My Subscription: Billing history and plan management. Nothing to configure. Know where it is.


    Systeme.io

    Quick Reference — All Settings Sections at a Glance

    SettingWhen to actionWhat it controls
    ProfileDo nowName, address, invoice details, customer type
    AccountDo nowTimezone, date format, time format
    My PlanReview nowCurrent limits — note the 1 automation rule wall
    Payment SettingsDo nowCurrency, VAT, receipts, terms, access settings
    Email SettingsDo nowSender name, sender email, domain authentication
    CoursesWhen building a courseStudent sessions, download permissions
    Custom DomainsDo nowConnect domain, ensure it resolves to a live page
    Payment GatewaysBefore first productStripe, PayPal, Razorpay, Paystack
    Sales Funnels SettingsWhen building funnelsGlobal funnel defaults
    ShippingPhysical products onlyShipping zones and rates
    Affiliate ProgramWhen ready to recruitYour own affiliate program setup
    API KeysDevelopers onlyThird-party API connections
    WebhooksAdvanced use onlyExternal system event triggers
    IntegrationsWhen neededZoom, Google Meet, Sheets, ActiveCampaign
    Affiliate PayoutsWhen affiliate program is liveHow affiliates get paid
    NotificationsReview nowWhich alerts Systeme.io sends you
    Workspace MembersWhen working with a teamTeam access and permissions
    SecurityLeave 2FA onTwo-factor authentication
    Manage SubscriptionKnow where it isBilling history and plan management

    Frequently Asked Questions

    Do I need to complete all Systeme.io account settings before building a funnel?

    No, but you need to complete the four priority settings before building: Profile, Account timezone, Payment Settings, and Email Settings. The remaining settings can be configured as you need them. Skipping the priority four causes problems that are harder to fix once you have started building.

    Why does the timezone setting matter in Systeme.io?

    Systeme.io uses your timezone to determine when scheduled emails and automation sequences actually fire. If your timezone is set incorrectly, a welcome email scheduled for 9am could fire at 3am for your audience. Set it to your actual timezone before building any automation.

    Can I use a Gmail address as my Systeme.io sender email?

    No. Systeme.io requires a custom domain email address as your sender, for example david@yourdomain.com rather than yourdomain@gmail.com. Gmail and Yahoo addresses are not accepted. You also need to authenticate your domain with CNAME and DMARC records before emails will be delivered reliably. The full process is covered in [Systeme.io Emails Not Sending or Going to Spam? Fix It With Hostinger DNS, opens in new tab].

    What happens if I set the wrong default currency in Systeme.io?

    The default currency becomes the pre-selected currency every time you create a new price plan. If it is wrong you will need to manually correct it on every product you create going forward. It does not affect existing products, only new ones. Fix it in Payment Settings before building your first product.

    Is the Systeme.io free plan good enough to get started?

    Yes. The free plan includes 2,000 contacts, 3 sales funnels, unlimited email sending, unlimited file storage, 0% transaction fees, and a built-in affiliate program with no credit card required. The real limit to watch is the 1 Automation Rule. That is the first wall most builders hit, often before reaching anywhere near the contact limit. Upgrade to Startup at $170 per year when you need more than one active automation.

    Do I need to connect a payment gateway before building my first funnel?

    If your funnel includes a purchase step such as a product, order form, or checkout page, yes, you need a payment gateway connected before going live. If your first funnel is a lead capture funnel with only an opt-in page and thank you page you can build without a gateway connected. Add it before you build any paid products.

    Should I turn off two-factor authentication in Systeme.io?

    No. Two-factor authentication is on by default and should stay on, especially if you are taking payments or storing customer data. Check Trust This Device on your own computer to avoid entering a code on every login from that machine. Keep 2FA active and remove the friction only for your own trusted devices.

    Why does my domain need a live page for email deliverability?

    In 2026, ISP spam filters actively check whether the domain used as your email sender resolves to a real active webpage. A domain pointing to a 404 error or a coming soon page signals low reputation to those filters before your authentication records are evaluated. Connect your domain and point it to a live Systeme.io page immediately. Even a simple one satisfies this check.

    What is the spam complaint threshold I need to stay below?

    Google, Yahoo, and Microsoft all enforce a 0.3% spam complaint rate threshold for sending domains in 2026. Exceeding this damages your deliverability regardless of how well your authentication records are configured. Always test new emails on a personal inbox before sending to your list. Only send to people who have actively opted in and keep your list clean.


    Related Guides

    Work through these in order. Each one builds on the previous.

    Systeme.io Emails Not Sending or Going to Spam? Fix It With Hostinger DNS 

    What it covers: The complete email authentication process, including CNAME records, DMARC TXT record, sender address confirmation, and deliverability troubleshooting.

    How to Connect a Hostinger Domain to Systeme.io 

    What it covers: Every DNS record required to connect a Hostinger domain to Systeme.io, including 2 CNAME records, 1 ALIAS redirect, and 10 CAA records, with screenshots of every step. Read it here

    How to Build Your First Systeme.io Funnel 

    What it covers: Opt-in page and thank you page build, connected domain as funnel homepage, and funnel settings.

    How to Set Up Systeme.io Email Automation

    What it covers: Email campaign that triggers when someone opts in through the funnel, sequence structure, and automation rules.


    Your Account Is Ready: Here Is What to Build Next

    Systeme.io is a capable platform. But it rewards people who set it up correctly before building and it punishes people who skip the back end and go straight to the funnel builder.

    The settings documented in this article are not optional extras. They are the foundation everything else runs on. Profile populates your invoices. Timezone controls your automation timing. Email authentication determines whether your messages reach anyone. Currency defaults follow you into every product you create. Your domain needs to resolve to something real before spam filters trust it.

    Get these right now and everything you build from this point will work the way it is supposed to.

    The next step is connecting your domain and authenticating your email. Both have dedicated articles and videos in this series. Work through them in order and the setup will hold together properly from day one.

    Tools used in this series:

    Get your free Systeme.io account, no credit card required: affiliatetactichive.com/startsysteme

    Get your domain and hosting with Hostinger: affiliatetactichive.com/hostinger
  • Systeme.io Emails Going to Spam? The Hostinger DNS Fix (2026)

    If your Systeme.io emails are not sending, not reaching inboxes, or landing in the spam folder, the fix is almost always in your domain’s DNS settings.

    Systeme.io requires domain authentication before emails can be delivered reliably. This means adding specific DNS records CNAME records and a DMARC TXT record to your Hostinger DNS zone so that receiving email servers recognise Systeme.io as an authorised sender for your domain. Without these records in place, emails either land in spam or never arrive at all.

    This guide documents the complete setup for Hostinger users built from configuring this on a real project covering every record, every step, and what to check when authentication stays pending past 24 hours.


    What causes Systeme.io emails to fail or go to spam

    Domain authentication is the process of adding DNS records to your domain’s hosting account that tell receiving email servers Gmail, Outlook, and others that Systeme.io is authorized to send emails on your domain’s behalf.

    When these records are missing or configured incorrectly in Hostinger, receiving servers cannot verify the source of the email. The result is one or more of these outcomes.

    1 — Emails land in the spam or junk folder instead of the inbox.

    2 — Emails are silently dropped and never delivered to the recipient.

    3 — The sender address shows as unverified inside Systeme.io settings.

    4 — Welcome emails do not send after a contact opts in through a funnel.

    5 — Follow-up sequences stop delivering part way through a campaign as receiving servers flag the domain.

    6 —The “from” name displays incorrectly because the sending domain has not been confirmed.

    None of these problems are caused by your email content or your Systeme.io settings. They are caused by missing or incorrectly configured DNS records in Hostinger. The fix happens in Hostinger not inside Systeme.io.


    What you need before starting

    Before making any changes in Hostinger, confirm you have everything listed below. Having these ready before you start prevents interruptions mid-setup.

    1 — A domain registered and active in Hostinger. Your domain must be connected to an active website not a parked page or a blank holding page. Systeme.io will not complete domain verification for a domain that does not resolve to live content. If your domain is not yet connected to a WordPress installation or a Systeme.io funnel page do that first.

    2 — Access to Hostinger hPanel. You will be making changes in the DNS Zone editor. Log in to hPanel before starting and locate the DNS Zone section under your domain management. Knowing where it is before you need it saves time during the setup.

    3 — Your Systeme.io account opened in a second browser tab. The DNS record values you will add to Hostinger are generated inside Systeme.io settings. Having both accounts open simultaneously means you can copy values directly without switching between tabs and risking transcription errors.

    4 — An email address for DMARC reporting. The DMARC TXT record you will add in Step 3 requires a reporting email address; this is where DMARC diagnostic reports are sent. Use a real accessible email address. A dedicated address for this purpose is preferable to your main inbox as DMARC reports arrive frequently and are technical in nature.

    5 — Access to DNSChecker and MXToolbox Both are free tools used to verify that DNS records have propagated correctly after being added in Hostinger. Systeme.io’s own verification interface can lag behind actual DNS propagation, these tools allow you to confirm records are resolving correctly before concluding something went wrong. No account required for either. dnschecker.org, mxtoolbox.com


    How to fix Systeme.io email authentication in 6 steps

    The following steps walk through the complete domain authentication setup from generating the DNS records inside Systeme.io to confirming the sender email address that contacts will see. The full process takes approximately 20 to 30 minutes. Most of that time is waiting for DNS propagation rather than active configuration.

    Work through the steps in order. Each step depends on the one before it.

    Step 1, Generate your DNS records in Systeme.io

    The first step happens inside Systeme.io not in Hostinger. You are generating the specific DNS record values that your account requires. These values are unique to your domain and account. Do not use values from a screenshot or another tutorial.

    Follow these steps inside your Systeme.io account.

    Systeme.io will now show a pending status for your domain. To view the actual record values click the eye icon below the DNS settings. Your records will appear, copy each one carefully into the next step.

    The records generated will be:

    3 CNAME records: these authenticate your domain as an authorised sender for Systeme.io. Each CNAME record has a Name value and a Value that points to a Systeme.io server address.

    1 DMARC TXT record: this tells receiving email servers how to handle any emails from your domain that fail the authentication check. It also contains a reporting address, the rua field where DMARC diagnostic reports are sent. You will add the email address for this field in Step 3.

    Leave your Systeme.io tab open. You will copy these values directly into Hostinger in the next step.

    Step 1 is now complete and your DNS record values are now generated and visible in Systeme.io settings.


    Step 2, Add the CNAME records in Hostinger

    This step happens in the Hostinger hPanel. You are adding the three CNAME records generated in Step 1 to your domain’s DNS zone.

    Navigate to the DNS Zone editor using this path:

    hPanelHostingManageDNS Zone

    Before adding the records scan the existing DNS entries for any records with Name values that match the ones you are about to add. If any exist from a previous setup delete them before proceeding to avoid conflicts.

    For each of the three CNAME records follow these steps.

    1. Click Add Record
    2. Select CNAME as the record type
    3. In the Name field you will enter the subdomain portion of the value shown in Systeme.io. The full value in Systeme.io will look like “si1234567.yourdomain.com” enter only “si1234567” in Hostinger. Do not include your domain name.
    4. In the Content or Points To field, paste the value from the Systeme.io Value column exactly as it appears. Do not add spaces before or after. Do not add line breaks.
    5. Leave the TTL field at the Hostinger default 14400. Do not change this.
    6. Click Save

    Repeat for all three CNAME records.

    The three records will follow this structure:

    TypeNameValue
    CNAMEsi[your account number]Points to a Systeme.io server address
    CNAMEs1._domainkey.[yourdomain]Points to a Systeme.io DKIM server
    CNAMEs2._domainkey.[yourdomain]Points to a Systeme.io DKIM server

    The exact values in the Name and Value columns come from your own Systeme.io account. The table above shows the format only, do not use these values directly your values will be different.

    Step 2 is now complete: All three CNAME records are saved in your Hostinger DNS zone.


    Step 3, Add the DMARC TXT record

    Still in the Hostinger DNS Zone editor from Step 2.

    The DMARC record tells receiving email servers what to do when an email from your domain fails authentication and where to send reports about those failures. Without it Systeme.io domain authentication will remain incomplete even if the three CNAME records from Step 2 are resolving correctly.

    Before adding the record check your existing DNS entries for any TXT record with the Name value _dmarc. If one exists from a previous setup, delete it before proceeding. Two DMARC records on the same domain conflict with each other and will prevent authentication from completing.

    Follow these steps to add the DMARC TXT record.

    1. Click Add Record
    2. Select TXT as the record type
    3. In the Name field enter “_dmarc” exactly as shown, including the underscore. Do not add your domain name after it. Hostinger adds that automatically.
    4. In the Content field use the DMARC value generated by Systeme.io in Step 1. It will follow this format:

    “v=DMARC1; p=none; rua=mailto:youremail@yourdomain.com”

    Replace “youremail@yourdomain.com” with a real email address you can access. This is where DMARC diagnostic reports will be sent. A dedicated address for this purpose is preferable to your main inbox, DMARC reports are technical and arrive regularly.

    1. Leave the p=none policy value as is. This is the correct setting for a new domain authentication setup. It means emails that fail authentication are still delivered while failures are reported to your rua address. Do not change this to “p=reject” or “p=quarantine” until your authentication has been confirmed as working correctly for an extended period.
    2. Leave the TTL field at the Hostinger default, 14400.
    3. Click Save

    The completed DMARC record will look like this in your DNS zone:

    TypeNameValue
    TXT_dmarcv=DMARC1; p=none; rua=mailto:yourreportingemail@yourdomain.com

    Step 3 complete: The DMARC TXT record is saved in your Hostinger DNS zone. All four authentication records are now in place.


    Step 4, Wait for DNS propagation

    DNS propagation is the process of a DNS change made in Hostinger spreading across DNS servers around the world. When you save a record in Hostinger it does not update everywhere instantly it spreads gradually over minutes to hours. Most records resolve within 30 minutes to a few hours. Full propagation across all global servers can take up to 24 hours.

    Do not delete and re-add records during this period. Deleting a record resets its propagation timer and extends the wait. Check propagation status using DNSChecker before making any changes.

    Checking CNAME propagation in DNSChecker

    A small number of servers showing as unresolved during the propagation window is normal. If the majority of servers are showing green within a few hours propagation is progressing correctly.

    Checking TXT record propagation in DNSChecker

    Repeat the same process for the DMARC TXT record.

    Both the CNAME records and the TXT record need to be resolved correctly before moving to Step 5.

    If records are not showing after 24 hours, go to the troubleshooting section at the end of this guide before making any changes in Hostinger.

    Step 4 complete: DNS records are propagating and resolving correctly across global servers as confirmed in DNSChecker.


    Step 5, Verify the records in MXToolbox

    DNSChecker in Step 4 confirmed that your DNS records have propagated to global servers. MXToolbox does something different: it checks whether the email authentication records are correctly formatted and functioning as intended. A record can propagate correctly and still fail authentication if the values are not formatted correctly.

    What MXToolbox checks

    MXToolbox checks three email authentication standards simultaneously.

    DKIM: DomainKeys Identified Mail. Verified through the CNAME records added in Step 2. Confirms that Systeme.io is authorised to sign emails sent from your domain.

    DMARC: Domain-based Message Authentication Reporting and Conformance. Verified through the TXT record added in Step 3. Confirms the policy for handling emails that fail authentication.

    SPF: Sender Policy Framework. For Systeme.io domain authentication the CNAME records added in Step 2 handle SPF authorisation. You do not need to add a separate SPF record in Hostinger for Systeme.io.

    Running the verification

    Reading the results

    A passing result for each test indicates that the record is present, correctly formatted, and functioning as intended.

    If any test shows as failing, check the following before making changes in Hostinger.

    Allow the full 24 hour propagation window to pass if you have not already done so. Records that have not fully propagated may show as failing in MXToolbox before they show as passing.

    If DMARC shows as failing after 24 hours, verify that the TXT record Name in Hostinger is exactly “_dmarc” with no additional characters.

    If DKIM shows as failing after 24 hours return to Step 2 and verify that all three CNAME record values were entered exactly as generated by Systeme.io with no spaces or line breaks.

    Step 5 complete: DKIM, DMARC, and SPF are verified as passing in MXToolbox. Email authentication is correctly configured.


    Step 6 Confirm domain verification and sender email in Systeme.io

    This step confirms two things inside Systeme.io. First that the domain authentication records are recognised as correctly configured. Second, the sender email address is confirmed and ready to use. Both need to be completed before emails will be sent correctly from your custom domain address.

    Checking domain verification status

    The status should now show as Verified.

    If the status still shows as Pending after 24 hours go to the troubleshooting section at the end of this guide before making any changes in Hostinger or Systeme.io.


    Confirming your sender email address

    Domain verification confirms that Systeme.io is authorised to send emails from your domain. The sender email address confirmation is a separate step that confirms the specific “from” address your contacts will see.

    If the confirmation email does not arrive within 10 minutes check your spam folder first. If it is not there, confirm that your domain is resolving to an active website. Systeme.io does not send verification emails to domains that point to blank or parked pages.

    Important: the sender email address must be at your authenticated domain. Using a Gmail or Yahoo address as your sender address will cause deliverability problems regardless of whether your domain authentication is complete.

    Step 6 complete: Domain verification shows as Verified in Systeme.io and the sender email address is confirmed. The authentication setup is complete and emails sent through Systeme.io will now reach inboxes.


    Troubleshooting domain still showing as Pending after 24 hours

    Work through the checks below in order before making any changes in Hostinger or Systeme.io. Each check addresses a specific failure condition. Identify which one applies to your setup before taking any action.

    Use this section only after the full 24 hour propagation window has passed and after you have checked record status in both DNSChecker and MXToolbox. Changes made before propagation is complete may compound the problem rather than fix it.


    Check 1 — Incorrect CNAME Name field entry

    The most common CNAME setup mistake is entering the full domain value in the Name field rather than the subdomain portion only.

    The Name value in Systeme.io will look like “si1234567.yourdomain.com”. In Hostinger the Name field should contain only “si1234567”. If you entered the full value including your domain name delete the record and re-add it with the subdomain portion only.

    Check all three CNAME records for this issue.


    Check 2 — Conflicting CNAME records from a previous setup

    If you have previously set up Systeme.io domain authentication and are repeating the process your DNS zone may contain old CNAME records with the same Name values as the new ones.

    Two records with the same Name value in the same DNS zone conflict with each other and prevent correct resolution. Go to your Hostinger DNS Zone editor and check for duplicate CNAME records with the same Name values. Delete the older versions and keep only the records generated in your current Systeme.io setup.


    Check 3 — Spaces or line breaks in pasted values

    DNS record values that contain a space or an invisible line break character will fail to resolve correctly even though they appear to be correct when viewed in Hostinger.

    This happens most often when values are copied from a PDF, an email, or a formatted document rather than directly from Systeme.io settings.

    Delete the affected record. Re-add it by copying the value directly from your Systeme.io settings and pasting into Hostinger without any intermediate application. If the problem persists, retype the value manually rather than pasting.


    Check 4 — Conflicting DMARC records

    If your domain had an existing DMARC TXT record before you added the one in Step 3 you now have two _dmarc TXT records in your DNS zone. Two DMARC records conflict with each other and will prevent DMARC authentication from completing.

    Go to your Hostinger DNS Zone editor and check for TXT records with the Name value _dmarc. If two exist, delete the older one and keep only the record added during this setup.


    Check 5 — Domain not connected to an active website

    Systeme.io will not complete domain verification for a domain that does not resolve to active content. If your domain is pointing to a parked page, a holding page, or returning an error, connect it to your Hostinger WordPress installation or your Systeme.io funnel page and attempt verification again.

    This requirement applies specifically to the Systeme.io verification process. The domain must resolve to live content in the Systeme.io account where authentication is being completed.


    Check 6 — Sender email address not at the authenticated domain

    If your sender email address in Systeme.io is a Gmail, Yahoo, or any other address not at your authenticated domain, emails will have deliverability problems regardless of whether domain authentication shows as Verified.

    Go to Systeme.io Settings, Emails, Under Sender email Section. Confirm that the “from” address is at your authenticated domain. For example “hello@yourdomain.com” not “yourname@gmail.com”.


    If all checks pass and the domain still shows as Pending

    If you have worked through every check above, confirmed all records are correctly entered in Hostinger, waited the full 24 hour propagation window, and the domain still shows as Pending in Systeme.io the issue is likely account-specific rather than a configuration problem.

    Contact Systeme.io support directly with the following information.

    Your domain name, the date and time you added the DNS records in Hostinger, A screenshot of your current DNS records in Hostinger DNS Zone editor, A screenshot of the domain status in Systeme.io Settings, Emails, Domains, The results of your DNSChecker and MXToolbox verification.

    Providing this information upfront significantly reduces the time to resolution in support conversations.


    A note from real experience

    A note from the setup

    I work full time in construction. This setup got done in the evenings and weekends not during business hours when support is easiest to reach.

    During my own Systeme.io domain authentication setup on Hostinger I hit a point where the records looked correct in the DNS zone but I wanted to confirm I had not missed anything before waiting for the full propagation window.

    What I found was more useful than I expected.

    Hostinger has an AI assistant called Kodee that is connected directly to your account. It is not a generic chatbot that gives you documentation links. It can see your account, answer specific questions about your DNS configuration, connect you to customer support if needed and, this is the part most people do not know, it can make basic changes to your DNS settings directly if you describe what needs to be done.

    I used Kodee to confirm my record entries were correct before waiting for propagation. The conversation was specific to my actual DNS zone, not a generic troubleshooting script.

    If you hit a wall during this setup and are not sure whether to wait or make a change, open Kodee in your Hostinger hPanel. Describe exactly what you are seeing and what you have already done. It is faster than submitting a support ticket and more specific than searching documentation.

    The Kodee assistant is in the bottom right corner of Hostinger hPanel. It is available whether or not Hostinger’s human support team is online.


    Complete setup checklist, Systeme.io email authentication with Hostinger DNS

    Use this checklist as a final verification once all six steps are complete. Every item should be confirmed before concluding the setup is finished.

    Prerequisites

    ☐ Domain registered and active in Hostinger 

    ☐ Domain resolving to an active website not a parked or blank page 

    ☐ Dedicated email address ready for the DMARC rua reporting field

    DNS records in Hostinger

    ☐ Three CNAME records added in Hostinger DNS Zone 

    ☐ Each CNAME Name field contains the subdomain portion only not the full domain value 

    ☐ Each CNAME Value field contains the exact value from Systeme.io with no spaces or line breaks 

    ☐ DMARC TXT record added with _dmarc as the Name real email address in the rua field 

    ☐ No duplicate CNAME records with the same Name values in the DNS zone 

    ☐ No duplicate _dmarc TXT records in the DNS zone

    Propagation and verification

    ☐ DNS propagation waited minimum 2 hours before checking, up to 24 hours for full propagation 

    ☐ DNSChecker used to confirm CNAME records resolving correctly select CNAME from record type dropdown 

    ☐ DNSChecker used to confirm DMARC TXT record resolving correctly select TXT from record type dropdown 

    ☐ MXToolbox verification completed DKIM, DMARC, and SPF all passing

    Systeme.io confirmation

    ☐ Domain showing as Verified in Systeme.io Settings, Emails, Domains 

    ☐ Sender email address entered at the authenticated domain not a Gmail or Yahoo address

    ☐ Sender email confirmation link clicked from the Systeme.io verification email

    If something is not resolving correctly

    Before contacting support, open Kodee in Hostinger hPanel. Kodee is connected to your account and can confirm whether your DNS records are correctly configured. It can also make basic DNS changes directly if needed. The Kodee assistant is in the bottom right corner of hPanel.

    If all checklist items are confirmed and the domain still shows as Pending work through the troubleshooting section above before contacting Systeme.io support.


    What comes next

    Domain authentication is the foundation. With your domain verified in Systeme.io and your sender address confirmed your emails will now reach inboxes reliably.

    The next step in the setup sequence is building the funnel that collects contacts, the opt-in page and thank you page that connects to your email configuration.

    → How to Build a Simple Funnel in Systeme.io coming soon

    If you prefer video the full Systeme.io setup series covering every step in the correct order is on YouTube at LaunchWithDavid.

    → Systeme.io Setup for Beginners playlist, youtube.com/@launchwithdavid

    The video companion for this specific article covering the domain authentication process with a live Hostinger DNS walkthrough is here.

    Systeme.io Emails Not Sending or Going to Spam? Fix It With Hostinger DNS, YouTube


    The tools used in this guide

    If you are not yet set up on Hostinger or Systeme.io both have free or low cost entry points that cover everything in this guide.

    Get started with Systeme.io free plan available: The free plan covers funnels, email, and domain authentication. No credit card required.

    Get your domain with Hostinger: Domain registration and hosting. The DNS Zone editor used throughout this guide is inside Hostinger hPanel.


    Affiliate disclosure: Some links in this article are affiliate links. If you sign up through them AffiliateTacticHive will earn a commission at no extra cost to you. Every tool linked here is one used on real projects. Full disclosure at affiliatetactichive.com/affiliate-disclosure

  • How To Rank a Niche Site on Google

    How did this site rank on Google?

    (2026 Case Study: 32,000+ Impressions)

    This niche site ranked on Google by targeting long-tail problem-based keywords, maintaining a focused content structure, and using a simple technical setup that allowed fast indexing. Within 28 days, the site reached over 32,000 impressions with an average position of 7.3, showing that clarity and structure outperform complexity.


    What This Case Study Shows

    Most people in digital marketing are shown results without context.

    They see traffic screenshots, income claims, and growth charts. What they are not shown is what had to be built underneath those results.

    This article breaks that down.

    EasyGamerSetups.com is not just a website. It is a working example of what happens when you stop chasing random tactics and start building a structured system.


    Niche Site Definition (2026 Context)

    A niche site is a focused website built around a specific problem or topic. Unlike broad websites, niche sites concentrate content around tightly related search queries, increasing topical relevance and improving ranking potential in Google Search and AI-driven discovery systems.


    EasyGamerSetups.com Performance (28-Day Snapshot)

    • Total impressions: 32,193
    • Total clicks: 148
    • Average click-through rate (CTR): 0.48%
    • Average position: 7.3
    • Top-performing page position: approximately 5.5

    The key takeaway is simple.

    The site is not invisible. It is being surfaced in search results and is already competing on page one for multiple queries.


    Why This Site Ranked (When Others Don’t)

    Most beginner websites fail to gain traction for a few predictable reasons.

    They target topics that are too broad.
    They publish content without a clear direction.
    They build on unstable or overly complex setups.

    This site avoided those problems by doing the opposite.

    The content focused on a specific problem set instead of a general category.
    Each article aligned with a clear search intent.
    The technical setup remained simple and consistent.

    Google rewards clarity and alignment more than volume.


    The Niche Strategy: Why Focus Beats Breadth

    Instead of trying to build a general gaming site, the content stayed within a narrow lane:

    • Windows optimization
    • gaming performance issues
    • PC troubleshooting

    This matters because search engines evaluate topical relevance.

    Broad sites often send mixed signals. Focused sites reinforce a single theme across all content, which increases authority within that topic.

    The result is stronger ranking potential with less content.


    The System Behind the Rankings

    This was not random content creation. It followed a simple, repeatable structure.

    1. Clear niche targeting

    The site was built around specific problems inside gaming, not the entire category.

    2. Problem-based content

    Each article answered a real search query:

    • why is my game stuttering
    • how to fix FPS drops
    • Windows 11 performance issues

    This ensured alignment with search intent.

    3. Simple technical foundation

    The setup included:

    • a clean domain and hosting environment
    • a lightweight WordPress build
    • clear site structure

    There were no unnecessary tools or complex configurations.

    4. Consistency

    The site stayed in one direction.

    No switching niches.
    No chasing trends.
    No constant changes in tools or strategy.

    That consistency allowed the content to build momentum.


    What the Data Actually Means

    Most people look at clicks first.

    That is not the most important signal.

    The most important signal is impressions.

    With over 32,000 impressions in 28 days, Google is already testing and surfacing the content across search queries.

    This is the hardest part of ranking.

    Once your content is being shown, the next step is optimization.


    CTR vs Impressions: The “Impression Trap”

    One of the most important insights from this case study is the difference between visibility and clicks.

    Example:

    • Page A: 14,552 impressions, 107 clicks
    • Page B: 6,704 impressions, 8 clicks

    Both pages are being shown by Google.

    But only one is converting impressions into clicks.

    This reveals a critical concept.

    If a page has high impressions but low clicks, the issue is not ranking. The issue is positioning.

    This is usually caused by:

    • weak titles
    • poor alignment with search intent
    • low click appeal

    This is known as a CTR problem, not a ranking problem.

    Understanding this distinction changes how you improve your site.


    Why Long-Tail Keywords Made This Work

    The site began ranking for queries such as:

    • windows 11 25h2 stuttering
    • disable mpo Windows 11
    • PC gaming optimization

    These are not broad keywords. They are specific, problem-driven searches.

    This is where smaller sites can compete.

    Long-tail keywords typically have:

    • lower competition
    • clearer intent
    • higher relevance

    In 2026, search engines prioritize content that directly solves specific problems.

    You do not need to compete with large authority sites if your content is more relevant to the query.


    Technical Setup: What Supported the Build

    The content drove rankings, but the technical setup made it possible.

    The foundation included:

    • reliable hosting
    • fast page load speeds
    • clean site structure
    • proper indexing through Google Search Console

    This allowed:

    • faster crawling
    • quicker indexing
    • better visibility for new content

    When targeting newer or emerging topics, speed of indexing becomes an advantage.


    2026 SEO Checklist (What Made This Work)

    Before expecting results, these elements need to be in place:

    • Site is connected to Google Search Console
    • Pages are loading quickly on mobile
    • URLs clearly match the topic of the content
    • Content is structured for readability
    • No unnecessary plugins slowing the site

    These are not advanced tactics. They are foundational requirements.

    Skipping them creates friction that prevents ranking.


    What This Proved

    This case study showed that a complex system is not required to start gaining traction in search.

    What matters is:

    • clarity in niche selection
    • alignment with search intent
    • consistent execution
    • a stable technical foundation

    This is a different approach from what most beginners are told.

    Instead of adding more tools and strategies, the focus is on simplifying the system.


    What the Data Didn’t Hide

    This was not perfect.

    The overall click-through rate is still low.

    That means the site is ranking, but not fully converting that visibility into traffic.

    This creates a clear next step:

    • improve titles
    • strengthen hooks
    • better match search intent

    Once your content is being shown, you are no longer guessing. You are refining.


    What This Means If You Are Starting

    If you are trying to build something online, this is the part that matters.

    You likely do not need:

    • more tools
    • more strategies
    • more complexity

    You need:

    • a clear niche
    • a simple system
    • content that solves real problems
    • consistency over time

    Most people struggle not because they are doing too little, but because they are doing too many disconnected things.


    The Role of the System

    The tools used in this build supported the process, but they were not the reason it worked.

    They provided:

    • structure
    • stability
    • simplicity

    The system is what created direction.

    Without a system, effort becomes scattered. With a system, effort compounds.


    Final Takeaway

    EasyGamerSetups.com is not an example of overnight success.

    It is proof that a simple, structured approach can create real progress.

    Not through hype.
    Not through shortcuts.
    Through clarity and execution.

    The key idea is this:

    The visible results are not the business. The system behind them is.


    Where to Go Next

    If you want to understand the structure behind this case study, start with these:

    These connect the strategy, system, and setup behind what this case study demonstrates.

  • How to Build a Simple Funnel 2026 Step-by-Step Guide

    What is a simple funnel?

    A simple funnel is a 3-page system designed to turn attention into a specific action, usually an email signup or a sale. It removes distractions and guides a visitor through a clear path: opt-in → offer → next step, instead of letting them wander like on a traditional website.


    Simple Funnel Definition

    A simple funnel is a linear marketing path consisting of three core stages: Capture (Opt-in Page), Bridge (Offer Page), and Fulfill (Thank-You Page). Unlike a traditional website, a simple funnel removes navigation menus to focus the visitor on a single call-to-action (CTA), increasing conversion rates for lead generation and affiliate marketing in 2026.


    The 3-Page Architecture: Why “Simple” Outperforms “Complex”

    Most beginners think they need:

    • upsells
    • downsells
    • automation chains
    • 6–10 pages

    They don’t.

    A high-converting beginner funnel looks like this:

    1. Capture (Opt-in Page)

    Collect the email.

    2. Bridge (Offer Page)

    Pre-frame the offer before sending traffic to it.

    3. Fulfill (Thank You Page)

    Deliver next steps and confirm the action.


    What most people get wrong

    The “Sales Page” in a beginner funnel is not always a full sales page.

    In affiliate marketing, it’s usually a:

    Bridge Page

    That page does one job:

    • explain the offer
    • build trust
    • prepare the click

    Then send traffic to the actual product, this is where most beginner funnels break, they send traffic directly to an affiliate link with no context.


    Simple Funnel vs Traditional Website

    FeatureSimple FunnelTraditional Website
    StructureLinear (step-by-step)Open navigation
    GoalOne actionMultiple actions
    Conversion RateHigherLower
    User ExperienceGuidedSelf-directed
    Best ForBeginners, affiliate marketingBlogs, brands

    Step-by-Step: Build Your First Funnel in 60 Minutes

    If you’d rather watch this than read it, I’ve got step-by-step Systeme.io tutorials on my YouTube channel where I walk through the setup in real time so you can see exactly how the funnel is built, connected, and made live without guessing your way through it.

    Step 1: Create the funnel

    Inside your funnel builder:

    • Go to Sales Funnels
    • Click Create
    • Choose:
      • “Build an Audience” (for email collection)
      • or “Sell” (if you already have an offer)

    These templates remove setup friction.


    Step 2: Add your pages

    Every funnel is built in steps:

    • Opt-in page
    • Bridge page (sales page)
    • Thank-you page

    Inside the builder:

    • Click Add Step
    • Choose page type
    • Select a template

    Step 3: Connect the flow

    This is where most funnels fail.

    From your funnel setup process:

    • Opt-in button → Submit form → Next step
    • Bridge page button → Open URL (offer link)
    • Order → system handles next steps automatically

    If this is wrong, your funnel does not work.


    Step 4: Set your domain

    Your funnel needs a clean URL.

    This requires:

    • connecting your domain
    • assigning it to your funnel

    Without this, your funnel looks untrusted and conversion drops.


    The 2026 Technical Checklist

    Before you send traffic, these must be done. You can watch the actual set up by going to my YouTube Channel:

    1. Domain Connection

    • CNAME records configured
    • domain pointing correctly

    2. Email Authentication

    This is the part almost nobody explains If this is not set up your funnel is broken.

    You must configure:

    Why?

    Because if someone opts in and your email lands in spam:

    • they never get the welcome email
    • they never see your offer
    • the funnel dies

    3. DNS Propagation Awareness

    Changes to domains can take time. If your funnel “isn’t working,” it’s often just DNS delay.


    4. Mobile Optimization

    80%+ of traffic is mobile.

    Check:

    • headline readable without zoom
    • button visible immediately
    • fast load speed

    The Invisible System Most People Miss

    The funnel does NOT end at the thank-you page, when someone opts in, the system must:

    Automation Rule

    1. Capture the email
    2. Tag the contact
    3. Trigger a sequence
    4. Send a welcome email

    If this is not set:

    • you collect leads
    • but never follow up

    That’s not a funnel.
    That’s a leak.


    Why Funnels Fail: Solving Technical Friction and Design Overload

    1. Button misconfiguration

    If the button isn’t set to “Next Step,” nothing happens.


    2. No email setup

    Leads come in but nothing is delivered.


    3. Too many pages

    Every extra step reduces conversions.


    4. Sending traffic too early

    Testing before setup = false failures.


    5. Over-designing

    Design does not fix unclear messaging.


    Mobile Optimization in 2026

    Most people design on a desktop, That’s a mistake.

    What matters:

    • Headline visible above the fold
    • CTA visible without scrolling
    • Fast load time

    Large images = slow pages = lower conversions.


    My Personal Experience

    When I built my first funnel:

    • everything looked right
    • pages were live

    But nothing worked. The issue? the opt-in button wasn’t set to “Submit form” . I lost days of leads because of one setting, Check your button actions twice.


    Simple Funnel Example

    Traffic → Opt-in → Bridge → Offer → Thank You

    From your funnel setup system:

    • Opt-in sends to next step
    • Sales page links to order
    • System handles post-purchase flow

    Is a Simple Funnel Enough in 2026?

    Yes.

    A simple funnel is enough to:

    • build an email list
    • test offers
    • generate first sales

    Most people don’t need more pages.

    They need a working system.


    FAQ

    What is the easiest funnel to build?

    A 3-page funnel: opt-in page, bridge page, and thank-you page. It’s the fastest and most effective setup for beginners.


    Do I need email automation for a funnel?

    Yes. Without automation, leads are collected but never followed up, which breaks the system.


    Why is my funnel not converting?

    Most funnels fail due to:

    • button misconfiguration
    • poor mobile layout
    • no trust built before the offer

    How long does it take to build a funnel?

    A basic funnel can be built in 30–60 minutes using templates.


    Final Takeaway

    Most people don’t fail because funnels are complicated.

    They fail because:

    • they overbuild
    • skip the technical setup
    • or never finish

    A simple funnel works because it removes friction, not because it’s advanced.

  • Systeme.io vs ClickFunnels: Which Is Better for Beginners?

    What is the difference between Systeme.io and ClickFunnels in 2026?

    As of April 2026, the main difference between Systeme.io and ClickFunnels is simplicity versus depth.

    Systeme.io is an all-in-one platform with a free plan and paid plans starting around $17/month, designed to help beginners build funnels, send emails, and automate basic workflows in one place.

    ClickFunnels starts at $97/month and is built for more advanced marketing setups, offering deeper funnel customization and features geared toward scaling.

    For most beginners, Systeme.io is easier to start with and carries less financial risk, while ClickFunnels is better suited for users who already understand how funnels work and want more control.

    Comparison at a Glance (April 2026)

    • Systeme.io: Best for beginners and affiliate marketers needing a free entry point ($0–$17/mo).
    • ClickFunnels: Best for established brands running paid traffic who require advanced CRM and funnel optimization ($97+/mo).
    • The Verdict: Start with Systeme.io to build momentum without financial pressure. Switch to ClickFunnels only when your monthly revenue consistently covers the $1,200/year overhead.

    Why choosing between these two tools feels confusing

    Most people compare tools before they understand what they’re building.

    They look at:

    • features
    • templates
    • pricing

    But skip the bigger question, What does the system actually need to do?

    That’s why this decision feels bigger than it should, because without understanding the system:

    • every tool looks important
    • every feature feels necessary
    • every decision feels high-stakes

    If you’re still trying to understand how everything connects, start here:

    Read: what most beginners miss in affiliate marketing

    Expert Insight: In my experience building funnels, connecting domains, and setting up affiliate sites, the biggest technical hurdle for beginners isn’t the funnel design, it’s Email Deliverability. While ClickFunnels offers more design “toys,” Systeme.io makes email setup easier for beginners, but good deliverability still depends on proper domain connection and email authentication.


    Systeme.io: Best Budget-Friendly All-in-One Marketing Platform

    Systeme.io is an all-in-one platform to build your complete online business that combines:

    • funnel building
    • email marketing
    • automation workflows
    • course hosting
    • blog functionality

    Into a single system, instead of connecting multiple tools, everything works together inside one dashboard. That’s what makes it strong for beginners.

    The Technical Edge: One reason beginners find success here is that the platform manages the heavy lifting of email deliverability. Mailbox providers (like Gmail and Yahoo) have strict rules. Systeme.io handles the technical configurations behind the scenes. This ensures your emails actually land in the inbox without you needing a degree in server management.


    ClickFunnels 2.0: High-Performance Funnel Builder for Scaling Businesses

    ClickFunnels is a funnel-building and online marketing platform focused on helping users create optimized sales funnels.

    It includes:

    • funnel builder
    • email features (depending on plan)
    • product and checkout pages
    • automation tools

    It is more focused on conversion optimization and scaling, rather than simplifying the starting process.

    The Education Factor: While more expensive, ClickFunnels includes FunnelFlix, often called the “Netflix of Marketing.” It’s a massive library of training on copywriting, traffic, and strategy. For many, the $97/month isn’t just for the software; it’s for the high-level marketing education that comes with it.


    Systeme.io vs ClickFunnels: 2026 Pricing Comparison

    The primary cost difference is that Systeme.io offers a perpetual free tier, whereas ClickFunnels requires a minimum monthly investment of $97.

    Systeme.io pricing

    • Free plan available
    • Startup plan: ~$17/month
    • Higher tiers increase features and limits

    The free plan includes:

    • up to 2,000 contacts
    • funnels
    • email marketing
    • basic automation

    ClickFunnels pricing

    • Starts at $97/month
    • Higher tiers increase limits and features

    There is no true free plan for building a full system, they currently have a 3 day trial, however you do need to enter a credit card on sign up.


    The reality behind pricing

    For beginners, this isn’t just about cost, it’s about pressure.

    Paying $97/month before you understand what you’re doing creates pressure to “make it work fast.” Starting with a lower-cost or free system removes that pressure and gives you space to learn.


    Feature comparison (what actually matters)

    FeatureSysteme.ioClickFunnels
    Starting Price$0 (Free Forever)$97/month
    Startup Plan$17/month$81/month (Annual)
    Transaction Fees0% (Native)0% (Native)
    Payment SetupDirect Stripe/PayPal IntegrationStripe/PayPal integration with more setup complexity for beginners
    Learning CurveLow (Drag & Drop)Steep (Pro Features)
    Best ForAffiliate MarketersScaled Agencies

    To build a working funnel, here is your essential “bare bones” stack based on current market rates (using the latest pricing from Hostinger):

    • Custom Domain (~$0.01 first year / $19.99 renewal):
      • Where: Hostinger or Cloudflare.
      • Why: Your digital identity. Mandatory for authenticating your “sender” reputation.
    • Business Email Inbox (~$0.59/month):
      • Where: Hostinger Starter Email.
      • Why: Mandatory for 2026 DMARC/SPF compliance. You cannot run a professional funnel from a standard @gmail.com account.
    • All-in-One Platform ($0–$17/month):
      • Choice: Systeme.io (Free Tier is perfect for Day 1).
    • Payment Processor (Free to set up):
      • Choice: Stripe or PayPal.

    Total “Startup” Cash Outlay: ~$10.00 – $25.00 This covers your domain and a full year of professional email hosting.

    Pro Note: if you join Hostinger, or many other domain providers, they often have a first time offer or sale. Make sure you check the real price after the term (typically 1 year) ends


    User Experience: Why Systeme.io Wins on the Learning Curve

    Systeme.io is significantly easier to use because it removes decisions.

    Instead of choosing:

    • funnel builder
    • email tool
    • automation software

    You just use one system.

    ClickFunnels gives more flexibility

    But that also means:

    • more setup
    • more learning
    • more complexity

    And for beginners, complexity slows progress.


    What features do beginners actually need first?

    This is where most comparisons go wrong.

    Beginners don’t need:

    • advanced funnel logic
    • complex automation trees
    • high-level CRM systems

    They need:

    • a simple funnel
    • a way to collect leads
    • a way to follow up

    That’s it.


    What this actually looks like in a real system

    The best working system for beginners looks like this:

    Content
    → Funnel page
    → Email follow-up
    → Offer

    If you haven’t seen this built clearly:

    Read: how to build a simple funnel for beginners


    When should someone choose ClickFunnels instead of Systeme.io?

    ClickFunnels makes more sense when:

    • you already understand funnels
    • you are running paid traffic
    • you want deeper customization
    • you are optimizing conversions

    In other words, When you’re scaling, not starting


    The mistake most people make

    Most people choose based on “what is more powerful” instead of “what will I actually use consistently.” This feature-trapping is why most beginners stall before they ever launch. They get lost in complex settings instead of building momentum. Not because the tool failed, but because they chose a professional cockpit before they learned how to fly.


    Where hosting and domains fit into this decision

    This is something most comparisons skip, funnels don’t exist in isolation.

    You still need:

    • a domain
    • a place to manage it
    • a foundation for your system
    • and a professional Email so your emails don’t land in spam

    If you don’t understand this part:

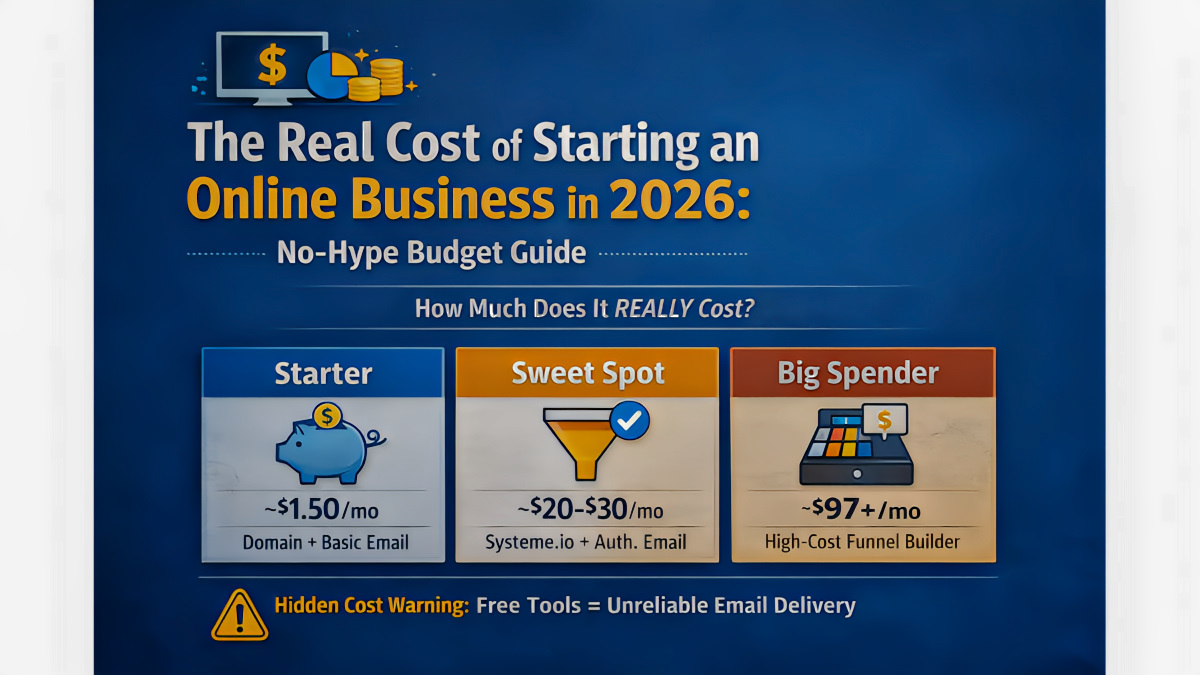
    Read: the real cost of starting an online business

    And if you want a simple setup:

    Read: my Hostinger review


    My personal recommendation

    Start with Systeme.io Not because it’s “better” in every way but because it’s easier to start with.

    It allows you to:

    • build your first system
    • understand how it works
    • reduce unnecessary cost

    Then, if you outgrow it you can always move to something more advanced.


    Final Verdict: Should You Start with Systeme.io or ClickFunnels?

    This isn’t really a tool comparison. It’s a stage-of-business decision.

    If you’re still figuring things out, Start Simple.


    FAQ

    Is Systeme.io better than ClickFunnels?

    For beginners, yes. It’s easier to use, more affordable, and removes unnecessary complexity.


    Why is ClickFunnels more expensive?

    ClickFunnels is designed for more advanced funnel building and optimization, which requires more features and flexibility.


    Can Systeme.io replace ClickFunnels?

    For most new and small online businesses, yes. It covers the core features needed to build a working system.


    Should I start with ClickFunnels?

    Only if you already understand funnels and plan to use advanced features.


    Technical Requirements FAQ (Updated with 2026 Hostinger Data)

    Will I need a custom domain? 

    Yes. For professional branding and email deliverability, you need a custom domain. While you can get a .com for as low as $0.01 for the first year, keep in mind that they typically renew at $19.99/year. Budgeting about $20/year for your domain is a safe bet for a long-term business foundation. You do not need the actual Website, that can be handled inside Systeme.io or Clickfunnels.


    Do I need to buy a separate hosting plan? 

    No. Both platforms host your pages on their own high-speed servers. However, you do need Email Hosting. Based on current rates, you can get a Starter Business Email for $0.59/month (billed annually). This gives you the professional @yourdomain.com address required to stay out of the spam folder.


    How do I handle payments? 

    Both platforms integrate directly with Stripe and PayPal and other payment processors. Systeme.io has simplified this to a “one-click” connection, making it slightly faster to set up for first-time sellers.


    Is it hard to move from ClickFunnels to Systeme.io? 

    With the advancements of AI, migration has become much easier. Systeme.io offers a migration service for their paid plans, but if you’re doing it yourself, you’ll need to manually copy over your website and recreate the design, as there is no “instant import” button between the two.


    Updated April 2026


  • Systeme.io Review 2026: Best Free Funnel Builder For Beginners?

    Is Systeme.io Worth It in 2026? (The Beginner’s Verdict)

    Systeme.io is one of the easiest ways for beginners to build a working online business system without paying for multiple tools.

    It combines funnels, email marketing, automation, and basic website features into one platform, including a free plan that allows you to start without upfront cost.

    However, it’s not built for advanced customization or complex automation. It works best for beginners who want a simple system that connects everything in one place.


    Updated April 2026


    Why most Systeme.io reviews miss the real point

    Most reviews focus on:

    • features
    • templates
    • pricing

    But skip the part that actually matters, how the system works. Because the real problem most beginners have isn’t choosing a tool It’s not understanding how:

    • funnels
    • email
    • domains
    • follow-up

    all connect that’s why tools feel confusing, if you haven’t seen that clearly yet:

    👉 Read: what most beginners miss in affiliate marketing


    What is Systeme.io?

    Systeme.io is an all-in-one SaaS platform that includes:

    • funnel builder
    • email marketing
    • automation workflows
    • course hosting
    • blog functionality

    Instead of connecting multiple tools, everything works inside one system.

    That’s what makes it beginner-friendly.


    How I’ve actually used Systeme.io

    I’ve used Systeme.io for around 3 years across real projects, not just testing it.

    Here’s what I’ve done with it:

    • connected custom domains
    • built funnels and landing pages
    • set up email campaigns and sequences
    • created simple automations
    • tested affiliate funnels
    • connected domains and handled DNS setup

    The setup reality (important)

    One thing that’s often skipped in reviews is the setup side, Systeme.io gives you the tools to send emails, but you still need to properly connect your domain.

    That means:

    • adding DNS records
    • setting up domain authentication
    • verifying your sending reputation via SPF, DKIM, and DMARC alignment.

    The platform simplifies this, but it’s still something you need to do.

    If you skip proper domain setup and authentication, your email deliverability can suffer, and some providers may filter or block your messages.

    It’s not complicated but it matters.

    I have a YouTube channel dedicated to setting up Systeme.io, visit it here to learn how to set up everything you need.


    Systeme.io Pros and Cons for Solopreneurs

    ProsCons
    Beginner-friendly systemLimited design flexibility
    Free plan is usableBasic automation on lower tiers
    Funnels + email in one placeNot built for complex setups
    Lower cost than most toolsAdvanced users may outgrow it
    Fast to launchFewer deep integrations

    The real takeaway

    Systeme.io is strong because it removes feature-trapping. Instead of overwhelming you with options it helps you get something working.


    What does the Systeme.io free plan include?

    The free plan is one of the biggest reasons people start with Systeme.io.

    It includes:

    • up to 2,000 contacts
    • funnels and funnel steps
    • email marketing
    • 1 automation rule
    • 1 workflow
    • 1 blog
    • 1 course

    The “one-goal” reality

    The free plan is designed for simplicity.

    You can:

    • build one funnel
    • capture leads
    • send follow-up emails

    But if you try to build:

    • multiple complex funnels
    • advanced automation paths
    • segmented email systems

    You’ll hit the limits quickly.

    The free plan is for validating one idea, not building a large system.


    Systeme.io 2026 Pricing: When Should You Actually Upgrade?

    Systeme.io has a free plan and multiple paid tiers that increase limits and features tnstead of focusing on exact pricing tiers (which can change), focus on this:

    When to upgrade

    Upgrade when:

    • your email list grows beyond the free limits
    • you need more automation rules
    • you’re building multiple funnels
    • your system is actually working

    Not before.

    The mistake to avoid

    Most beginners upgrade too early.

    They think:
    more features = better results

    But in reality:
    clarity + simplicity = better results


    The “hidden” costs of a “free” platform

    Even if you use Systeme.io for free, you’re not truly at $0 to build a real system in 2026, you still need:

    • a custom domain (~$20/year typical renewal range)
    • a professional email setup
    • proper domain authentication

    These aren’t upsells, they’re part of building something real.

    While Systeme.io allows you to send emails, you need a professional ‘inbox’ to receive them and to authenticate your domain. A Hostinger starter email at $0.59/month is the cheapest way to bridge this gap.

    Total realistic starting cost is still low, but not zero.


    What is Systeme.io best for?

    Systeme.io is best for:

    • beginners starting affiliate marketing
    • working adults building something on the side
    • people overwhelmed by too many tools
    • simple funnel + email systems
    • validating ideas without high upfront cost

    Who should NOT use Systeme.io?

    Systeme.io may not be the best choice if you:

    • need advanced funnel customization
    • want complex automation systems
    • run a large-scale business
    • rely on deep integrations

    At that point, more advanced tools may make sense.


    What a simple system actually looks like

    Most beginners overcomplicate this.

    A working system looks like:

    Content
    → Funnel page
    → Email follow-up
    → Offer

    That’s it if you haven’t seen this built step-by-step:

    Read: how to build a simple funnel for beginners


    Where hosting and domains fit into this

    Systeme.io handles the system, but your domain is what connects everything you still need:

    • a domain
    • a place to manage it
    • a foundation for your setup

    If you don’t understand this part:

    👉 Read: the real cost of starting an online business

    And if you want a simple setup:

    👉 Read: my Hostinger review


    My personal verdict after using Systeme.io

    Systeme.io is one of the best tools for beginners, not because it’s the most powerful but because it’s the simplest way to get started.

    It removes:

    • tool confusion
    • setup friction
    • unnecessary cost

    It’s not meant for advanced users but for beginners that’s exactly why it works.


    FAQ

    Is Systeme.io really free?

    Yes, the free plan includes funnels, email marketing, and basic automation with limits.


    Is Systeme.io good for affiliate marketing?

    Yes, especially for simple funnels and email-based systems.


    Do I need a domain to use Systeme.io?

    You can start without one, but for a real setup, a custom domain is strongly recommended.


    Is Systeme.io hard to set up?

    No, but you do need to connect your domain and email properly for best results.


    When should I upgrade?

    When your system grows and you need more flexibility not before.


  • How Much Does It Cost to Start an Online Business in 2026? (The $40 Setup)

    How Much Does It Cost to Start an Online Business in 2026? (The $40 Setup)

    Starting an online business in 2026 costs approximately $39.07 for your first year. That covers a custom domain and professional business email with full DMARC, SPF, and DKIM authentication. Everything else, including your funnel builder, email automation, payment processing, and course hosting, can run on free tiers until your business model is validated. The $39.07 is not optional. It is the infrastructure that determines whether your emails reach inboxes or land in spam.


    Section 1: What Is the Real Cost to Start an Online Business in 2026?

    The answer is $39.07 for your first year.

    Not $0. Not $10,000. Thirty nine dollars and seven cents, if you build it the right way from the start using what I call The Lean Launch Stack.

    That number covers two things: a custom domain name and a professional business email address with authenticated sending. Everything else you need to launch a digital product or affiliate business runs on free tiers in year one.

    Most articles answer this question one of two ways. Either they tell you that you can start for free, which is technically true and practically misleading, or they give you a range from $100 to $60,000 depending on your business model, which is accurate for ecommerce and Amazon FBA but completely irrelevant for someone building a digital business part time.

    Neither answer helps you.

    I work full time in construction. I build digital systems in the evenings and weekends. I have been through the confusion of not knowing what to spend, what to skip, and what actually matters in the first year. This article is the answer I wished existed when I started.

    Business ModelTypical First Year CostWhy
    Affiliate Marketing$39.07Domain and email only. Platform is free.
    Digital Products$39.07Domain and email only. Systeme.io free plan covers everything else.
    Blogging$39.07 to $150Add hosting if you want WordPress. Not required to start.
    Ecommerce$500 to $3,000Inventory, Shopify or WooCommerce, payment processing, advertising.
    Amazon FBA$2,000 to $10,000Product sourcing, fulfilment fees, Amazon advertising, and LLC registration.
    Dropshipping$100 to $500Platform fees, paid ads, and product testing costs.

    This article covers affiliate marketing and digital products because that is the model that requires the least capital to validate and the most misunderstood startup cost structure.


    Section 2: Do You Have This Problem? Diagnose Where You Are

    This section is for two types of reader.

    The first is someone who has not started yet and wants to know exactly what to spend before building anything. If that is you, skip to Section 4.

    The second is someone who has already started and something is not working. Use the checklist below.

    Your emails are landing in the spam folder. You are likely sending from a free Gmail or Yahoo address without domain authentication. This is not a content problem. It is an infrastructure problem that costs $39.07 to fix permanently.

    You are paying for multiple tools that do not connect. You have fallen into what I call the Feature Trap. You are buying software to solve confusion instead of building a connected system. Go to Section 4.

    You are spending more than $50 per month without a single sale. Your costs are ahead of your validation. This is the most expensive mistake in online business and it is almost always caused by buying tools before the core system is proven. Go to Section 4.

    Your domain is connected but emails still go to spam. Your sending domain authentication records may be missing or misconfigured. SPF, DKIM, and DMARC records all need to be correctly in place. Go to Section 5.

    You feel like you need more tools to make things work. You probably need fewer tools configured correctly, not more tools added on top.


    Section 3: What Causes Beginners to Overspend or Underspend

    Most beginners do not get startup costs wrong because they are reckless. They get it wrong because no one gives them a straight answer about what is actually required versus what is being sold to them.

    Here are the most common causes.

    1. Believing free means being functional. A free Gmail address works for personal email. In 2026 it will not work reliably for business email. Google, Yahoo, and Microsoft enforce authentication requirements for bulk senders. Without SPF, DKIM, and DMARC records on a custom domain, your emails go to spam regardless of how good your content is. The average email open rate for authenticated senders is around 20 to 30 percent. For unauthenticated senders that number drops dramatically and in many cases to near zero.
    2. Confusing a domain with hosting. You do not need hosting to start. Systeme.io allows you to connect a custom domain via DNS settings without a separate hosting plan. Your landing pages and funnels run on your domain through Systeme.io at no cost. I assumed I would need hosting immediately when I first set this up. I did not. That is one expense removed entirely in year one.
    3. Buying tools to solve confusion. I have seen the same pattern repeat consistently among people starting out. They buy a funnel builder, then a standalone email platform like ConvertKit or Mailchimp, then a link tracker, then a course hosting platform. Three months in they are paying $150 to $200 per month. They still have not made a sale. Every tool purchase was trying to solve a problem that a simpler system would have prevented.
    4. Not accounting for renewal pricing. Most hosting and email platforms use low promotional pricing to attract new customers. The standard renewal rate is almost always higher. Always budget using the standard monthly rate, not the headline promotional price. For Hostinger Business Email that means budgeting $2.99 per month, not a lower promotional figure that only applies on a long term prepaid commitment.
    5. Skipping email authentication entirely. This is the single most expensive mistake a beginner makes. A list of 500 subscribers that you cannot reach because your emails land in spam is not a free problem. It costs you every subscriber you cannot convert and every sale that never happens because your follow up sequence never arrived. The email authentication cost of $19.08 per year is not optional. It is the thing that makes the list worth building.
    6. Over-investing before validating. Paying for a premium funnel builder, a dedicated email platform, a link tracker, and a course hosting tool before making a single sale commonly costs between $150 and $250 per month. That is $1,800 to $3,000 in year one before any revenue is generated. Systeme.io’s free plan replaces every one of those tools at no cost while the business model is being validated.

    Section 4: The Lean Launch Stack The Right Way and the Wrong Way

    There is no version of starting an online business in 2026 that costs $0 and works properly. The question is not whether you spend money. The question is whether you spend the right money at the right time on the right things.

    Here are the two paths.


    The Right Way: The Lean Launch Stack

    The Lean Launch Stack is the minimum viable infrastructure for a digital or affiliate business in 2026. It covers everything required for authenticated email delivery, professional branding, funnel building, email automation, and payment processing. It costs $39.07 in year one.

    How much does it cost to start an online business the right way? For a digital product or affiliate business, the Lean Launch Stack costs $39.07 in year one. That is one custom domain at $19.99 and one professional email address at $19.08 through Hostinger Business Email. Systeme.io’s free plan handles everything else including funnels, email sequences, automation, and payments at no cost.

    ItemProviderAnnual CostWhat It Does
    Custom Domain (.com)Hostinger$19.99Professional identity. Required for email authentication. Without this your emails go to spam.
    Business EmailHostinger Business Email$19.08 ($2.99 per month)Custom domain email address. Required for SPF, DKIM, and DMARC authentication. Cannot use Gmail or Yahoo for authenticated sending.
    Funnel BuilderSysteme.io Free Plan$0Build landing pages and sales funnels on your connected domain.
    Email AutomationSysteme.io Free Plan$0Email sequences and automation included. Unlimited sending on all plans.
    Payment ProcessingSysteme.io Free Plan$0Stripe and PayPal integration with 0% transaction fees.
    Course HostingSysteme.io Free Plan$0Host one course with unlimited students.
    SSL CertificateIncluded with Hostinger and Systeme.io$0Secure HTTPS connection. Required for trust and deliverability.
    Total Year One$39.07Everything needed. Nothing that is not.

    Domain name options and costs: .com: $19.99 per year via Hostinger .net or .org: $17.99 per year via Hostinger

    What The Lean Launch Stack gives you from day one:

    A professional funnel and landing pages running on your own domain. An email list with fully authenticated sending so emails reach inboxes rather than spam folders. Payment processing with 0% transaction fees through Stripe or PayPal. Course or digital product hosting included at no cost. The infrastructure to run affiliate offers through a connected funnel.

    What The Lean Launch Stack does not include yet and does not need to:

    A WordPress website. Not required to start. Systeme.io pages run on your connected domain without it. A paid email platform. Systeme.io’s built-in email sending handles sequences and broadcasts at no cost. A premium funnel builder. Three funnels on the free plan is sufficient to validate a first offer. Hosting. Not needed until you decide to build a full WordPress website.

    When to upgrade from the free plan: The Systeme.io free plan includes one automation rule. That is the first real limit most builders hit, typically before reaching 50 contacts rather than the 2,000 contact ceiling. When you hit that wall and your system is generating revenue, move to the Startup Plan at $170 per year. At that point the cost is justified because the system has already proven it works. Moving before that point is a Feature Trap decision.

    If you plan to add a WordPress website at any point, Hostinger WordPress hosting starts from $2.99 per month on promotional pricing. Factor in the standard renewal rate when budgeting. Your domain is already registered so there is no additional domain cost.


    The Wrong Way: The Feature Trap

    The Feature Trap is what happens when confusion is solved with tools instead of clarity.

    I have watched the same sequence repeat consistently. Someone starts an online business. Something does not work immediately. Instead of diagnosing the system, they buy another tool that promises to fix the problem. Then another. Then another. Three months later they are paying $185 per month or more and they have still not made a single sale.

    The tools are not necessarily bad. Some of them are genuinely good. The problem is the sequence and the timing. Buying solutions to problems you have not yet encountered is how beginner budgets get destroyed before the business is validated.

    ToolMonthly CostThe Problem
    Premium funnel builder$97Duplicates what Systeme.io does on its free plan.
    Standalone email platform (ConvertKit or Mailchimp)$29Duplicates Systeme.io’s built in email automation.
    Link tracker$20Not needed before you have traffic to track.
    Separate course hosting platform$39Systeme.io includes this at no cost on all plans.
    Total$185 per month minimum$2,220 per year before making a single sale.

    The Feature Trap does not fail loudly. It fails slowly. The monthly cost feels manageable. The tools feel productive. Six months in the spend is very real and the revenue is not. The instinct at that point is to add another tool to fix it.

    Comparison PointThe Lean Launch StackThe Feature Trap
    Year one cost$39.07$2,220 minimum
    Number of platforms to manage2 (Hostinger and Systeme.io)5 or more
    Email authentication includedYesDepends on configuration
    Payment processing fees0% via Systeme.ioVaries by platform
    Course hosting includedYesSeparate paid platform
    Validation before spendingYesNo
    Risk if business model fails$39.07 lost$2,220 or more lost

    The fix is not finding cheaper tools. The fix is building the simplest connected system, validating it with real people, and only then adding tools that solve real problems you have actually encountered.


    Section 5: The 2026 Deliverability Reality Why the $39.07 Is Non-Negotiable

    How much of your email actually reaches your audience without authentication? Studies from major email deliverability analysts consistently show that unauthenticated emails from custom domains have inbox placement rates below 20 percent on Gmail and Yahoo. Some estimates put legitimate unauthenticated senders at open rates of 5 percent or lower due to spam folder placement. For authenticated senders following best practices the average inbox placement rate is above 95 percent.

    The $39.07 in The Lean Launch Stack is almost entirely an authentication cost. Here is what it buys technically.

    What Is SPF and Why Does It Matter?

    SPF stands for Sender Policy Framework. It is a DNS record that tells receiving mail servers which servers are authorized to send email on behalf of your domain. Without an SPF record, receiving servers have no way to verify that an email claiming to come from your domain is legitimate. Gmail, Outlook, and Yahoo all check for SPF before accepting email.

    What Is DKIM and Why Does It Matter?

    DKIM stands for DomainKeys Identified Mail. It is a digital signature attached to every email you send. The receiving mail server checks this signature against a public key stored in your DNS records. If the signature is valid, the email is verified as untampered. DKIM is one of the three core authentication requirements enforced by major email providers in 2026.

    What Is DMARC and Why Does It Matter?

    DMARC stands for Domain-based Message Authentication, Reporting, and Conformance. It is a DNS policy record that tells receiving servers what to do when an email fails SPF or DKIM checks. Options include quarantining the email, which means send it to spam, or reject it outright. Without a DMARC record your domain has no policy in place and receiving servers make their own decisions, which usually means spam folder placement for unverified senders.

    What Is DNS and How Does It Connect Everything?

    DNS stands for Domain Name System. It is the system that translates your domain name into the technical records that control where your website, email, and other services point. SPF, DKIM, and DMARC are all configured as DNS records inside your domain registrar. For Hostinger users this is done inside the hPanel DNS zone editor. For other registrars the process is similar but the interface differs.

    Note on live webpage and deliverability: While SPF, DKIM, and DMARC are the documented and publicly enforced authentication standards, many deliverability professionals recommend ensuring your sending domain resolves to a functioning webpage as a general best practice for sender reputation. A domain pointing to a blank page or a 404 error may be interpreted as lower credibility by some spam filters. The officially documented requirements from Google, Yahoo, and Microsoft are SPF, DKIM, DMARC, one-click unsubscribe for bulk senders, and a spam complaint rate below 0.3 percent. Pointing your domain to a live page is strongly advisable but treated here as best practice rather than a confirmed hard requirement.

    In 2026 Google, Yahoo, and Microsoft enforce a spam complaint rate threshold of 0.3 percent for sending domains. Exceeding this threshold damages deliverability regardless of authentication records. Always test new emails on a personal inbox before sending to your list. Only send to people who have actively opted in and maintain a clean list.

    The math on skipping authentication: a list of 500 subscribers where emails land in spam has an effective reach close to zero. The $19.08 annual cost of Hostinger Business Email is not an expense. It is the thing that makes the list worth building.


    Section 6: Frequently Asked Questions

    Can I start an online business with no money?

    You can open accounts for free on platforms like Systeme.io without spending anything. However a functional business that reaches customers through email requires a custom domain and authenticated email sending. That costs approximately $39.07 in the first year. You cannot build an email list that works without it. Starting with $0 is technically possible. Starting with $0 and expecting emails to reach your audience is not realistic in 2026.

    What is the cheapest online business to start?

    Affiliate marketing and digital product businesses have the lowest startup costs of any online business model. Using The Lean Launch Stack, the first year cost is $39.07 covering a custom domain and authenticated business email. Everything else including funnels, email sequences, payment processing, and course hosting runs on Systeme.io’s free plan with no credit card required.

    Do I need a website to start an online business?

    No. You need a domain name, but not necessarily a hosted website. Tools like Systeme.io allow you to connect a custom domain via DNS and run landing pages and funnels on that domain without a separate hosting plan. When I set up my first funnel I skipped hosting entirely. The domain connected directly to Systeme.io and the pages ran on my domain from day one. Hosting becomes relevant when you want to build a full WordPress website, which is a separate decision from launching your first funnel.

    Do I need a business email address?

    Yes. In 2026 sending business email from a free Gmail or Yahoo address is not viable for building an email list. Major providers including Gmail, Outlook, and Yahoo enforce authentication requirements that can only be satisfied through a custom domain email with SPF, DKIM, and DMARC records in place. Hostinger Business Email costs $2.99 per month or $19.08 per year and gives you a professional address at your domain with full authentication support.

    Can I use Gmail for my business email?

    You can use Gmail personally but not as your business sending address for email marketing. Free Gmail addresses do not support the DNS-level authentication records that Google, Yahoo, and Microsoft require for bulk senders. If you want to use the Gmail interface with a custom domain, Google Workspace starts at $7 per user per month. For most beginners building a lean stack, Hostinger Business Email at $2.99 per month is more cost effective and covers all authentication requirements.

    Can I use Outlook or Cloudflare Email instead of Hostinger?

    Yes. The requirement is not a specific provider. The requirement is a custom domain email address with SPF, DKIM, and DMARC records properly configured. Microsoft 365 Business Basic provides Outlook with a custom domain starting at $7 per user per month. Cloudflare Email Routing is a free option that forwards email to an existing inbox but does not provide a full sending mailbox on its own. For a complete sending and receiving setup at the lowest cost, Hostinger Business Email at $2.99 per month is the option documented throughout this site.

    Is Shopify required to start an online business?

    No. Shopify is an ecommerce platform designed for physical product stores. If you are building a digital product or affiliate business, Shopify adds cost and complexity you do not need. Systeme.io handles payment processing for digital products with 0% transaction fees on all plans including the free tier. Shopify’s basic plan costs $39 per month plus transaction fees, which is unnecessary overhead for a lean digital business.

    Do I need an LLC or legal registration before starting?

    In most cases no. You can start as a sole proprietor to validate your business model. Focus the first year budget on technical infrastructure: domain, email authentication, and your platform. Legal structures add cost and complexity before there is revenue to protect. Consult an accountant or legal advisor in your jurisdiction before making this decision as requirements vary by country and region.

    Is it better to pay monthly or annually for tools?

    Start monthly on anything you are not certain you will keep. Once your system is generating enough revenue to cover the cost, switch to annual billing. Systeme.io’s Startup Plan costs $17 per month on monthly billing or $170 per year on annual billing, saving $34 annually. Only commit to annual billing once the platform is proven to work for your specific setup.

    Can I start an online business from my phone?

    You can manage much of the early setup from a phone. Systeme.io has a mobile-accessible interface and Hostinger’s hPanel works on mobile browsers. However configuring DNS records for email authentication and building funnel pages is significantly easier on a desktop or laptop. The initial setup of The Lean Launch Stack is best done on a computer. Day to day management, content creation, and email management can be handled from a phone once the system is running.

    What happens if I buy a domain but not hosting?

    You can still use the domain productively. Connect it to Systeme.io via DNS and your funnel pages will show your domain URL instead of a Systeme.io subdomain. This is exactly how The Lean Launch Stack operates in year one. Your business email also uses the domain without requiring hosting. Hosting becomes relevant when you want to build a full WordPress website, which can be added to Hostinger later without changing your domain.

    Do I need WordPress to start an online business?

    No. WordPress is one option for building a website but it is not required for a digital or affiliate business. Systeme.io builds and hosts your landing pages and funnels without WordPress. If you want to run a blog for SEO alongside your funnel, WordPress on Hostinger is a strong combination. But it is an optional addition to The Lean Launch Stack, not a requirement for launching.


    Section 7: Key Takeaways

    The real cost to start an online business in 2026 for a digital or affiliate business is $39.07 in year one.

    That covers one custom domain and one professional business email address with full SPF, DKIM, and DMARC authentication.

    Systeme.io’s free plan covers funnels, email automation, payment processing, and course hosting at no cost.

    The Feature Trap costs $185 per month or more and is almost always entered before the business model is validated.

    Email authentication is not optional in 2026. Google, Yahoo, and Microsoft all enforce authentication requirements. Unauthenticated senders face inbox placement rates that make building a functional email list effectively impossible.

    The Lean Launch Stack is two platforms: Hostinger for domain and email, Systeme.io for everything else.

    The first upgrade trigger is the Systeme.io automation rule limit, not the contact limit. Most builders hit this before reaching 50 contacts.


    Section 8: Related Guides

    These guides walk through the exact setup of The Lean Launch Stack step by step.

    Systeme.io Account Settings: What to Configure Before You Build Anything 

    What it covers: Every settings section in Systeme.io in the correct order. What to configure immediately, what can wait, and what breaks if you skip it. Includes email settings, payment settings, timezone, currency, and domain connection.

    Systeme.io Emails Not Sending or Going to Spam? Fix It With Hostinger DNS 

    What it covers: The complete email authentication process including SPF, DKIM, CNAME records, and DMARC TXT record configuration, plus sender address confirmation and deliverability troubleshooting.


    Section 9: Build The Lean Launch Stack Today

    The cost of starting an online business in 2026 is under $40.

    Thirty nine dollars and seven cents for the infrastructure that makes everything else work, and $0 for the platform that runs your funnel, your email list, and your payment system in year one.

    The difference between The Lean Launch Stack and the Feature Trap is not the quality of the tools. It is the sequence. Build the foundation first. Validate the system with real people. Add tools only when you have real problems they solve.

    The guides in Section 8 walk through every step in the correct order. Work through them in sequence and the system will be connected and functioning before you spend a dollar on anything optional.

    I work full time in construction and document this build in real time. No income claims, no inflated screenshots, no shortcuts. If you want to follow the real process, subscribe on YouTube and build it alongside me.

    Get your free Systeme.io account, no credit card required: Get your domain and business email with Hostinger.

  • How Affiliate Marketing Works: What Beginners Are Never Told in 2026

    Affiliate marketing works by connecting three things: attention, direction, and trust. You create content that attracts the right people, send them to a page that captures their email address, and follow up with value before introducing an offer. The mechanics are simple. The part most beginners miss is the system that connects all three. Without that system, even large amounts of traffic produce zero results.

    What Is Affiliate Marketing and How Does It Work?

    Affiliate marketing is a performance based business model where you earn a commission by recommending products or services to other people. When someone clicks your unique affiliate link and completes a purchase, the company pays you a percentage of that sale. You do not handle inventory, fulfillment, customer service, or returns. Your job is to connect the right person to the right product at the right moment.

    That is the simple version. And it is accurate.

    The part that causes confusion is everything between having a link and earning a commission. Most guides show you how to get the link. Almost none of them show you how to build the system that makes the link perform.

    I work full time in construction and build digital systems in the evenings and weekends. When I built EasyGamerSetups.com I generated 93,000 impressions and 214 organic clicks in the first 28 days using 14 articles with zero paid advertising. Those are real numbers documented in Google Search Console.

    But here is what those numbers did not produce: affiliate revenue.

    The traffic was real. The clicks were real. What was missing was the system that converts attention into action. No bridge page. No email capture. No follow up sequence. Just content pointing directly to affiliate links with nothing in between.

    That gap between traffic and revenue is exactly what this article explains.

    [TABLE: How Affiliate Marketing Works — The Basic Mechanics] Step, What Happens, Who Does It

    1. Someone searches for a solution to a problem, Types a query into Google or scrolls social media, The potential customer
    2. They find your content, Article, video, or social post that addresses their problem, You
    3. They click your affiliate link, Unique tracking link assigned to your account, You provide this
    4. They land on the merchant’s page, Product or service sales page, The merchant
    5. They complete a purchase, Payment processed by the merchant, The merchant and customer
    6. You earn a commission, Tracked via cookies and unique IDs, The affiliate network pays you

    This is how affiliate links work at the technical level. The cookie attached to your link stores the referral data for a set period, typically 30 to 90 days depending on the program. If the customer purchases within that window you receive the commission.


    Do You Have This Problem? Diagnose Where You Are

    This section is for two types of reader.

    The first is someone who has not started yet and wants to understand how affiliate marketing actually works before building anything. If that is you, continue reading in order.

    The second is someone who has already started and something is not working. Use the checklist below.

    You are creating content consistently but earning nothing. Your system has Attention but is missing Direction and Trust. You are sending people directly to affiliate links with no intermediate step. Go to Section 4.

    You have traffic but no email list. You are capturing attention without capturing leads. Every visitor who leaves is gone permanently. A bridge page with email capture would convert a percentage of that traffic into a list you can follow up with. Go to Section 4.

    You have an email list but low open rates. Your sending domain is likely not authenticated. Emails are landing in spam. This is an infrastructure problem not a content problem. Go to the related guides in Section 8.

    You feel like you need more tools to make things work. You almost certainly need fewer tools configured correctly. The confusion is coming from complexity, not capability. Go to Section 5.

    You are posting content on multiple platforms but nothing is converting. You are generating Attention across too many channels without a single clear Direction for where people go next. Go to Section 4.

    You bought a course and followed the blueprint but nothing clicked. The blueprint likely showed you tactics without showing you the system that connects them. Go to Section 3.


    Why Affiliate Marketing Feels Confusing. The Real Causes

    Affiliate marketing does not feel confusing because it is complicated. It feels confusing because most of what beginners are taught is incomplete.

    Here are the specific reasons.

    1. Tactics are taught without the system behind them. Most affiliate marketing content teaches individual tactics: write a review, add your link, post on social media. None of these tactics are wrong. But without a connected system they produce scattered results. You can follow every piece of advice correctly and still earn nothing because the advice was never designed to work together.
    2. The bridge between content and conversion is skipped. Most tutorials show you how to create content and how to get an affiliate link. Almost none of them show you what happens in between. That middle layer, the page that captures email addresses and the sequence that follows up, is where the actual conversion happens. Skipping it means sending cold traffic directly to a sales page, which converts at a very low rate in 2026.
    3. The wrong metric is being tracked. Beginners optimize for views, impressions, and follower counts because those numbers are visible and grow visibly. The number that matters is email subscribers. An email subscriber is a lead you can follow up with repeatedly. A social media follower sees your content only when the algorithm decides to show it.
    4. The Feature Trap replaces system building. When something does not work, the instinct is to buy another tool. A funnel builder, then a standalone email platform, then a link tracker, then a course hosting tool. Three months in the stack costs $150 to $200 per month and the system is still not connected. Affiliate success depends less on publishing frequency and more on publishing precision. The same applies to tools. Fewer tools configured correctly outperform more tools connected badly.
    5. Free traffic platforms are trusted more than owned channels. Social media reach depends entirely on platform algorithms. A post that reaches 10,000 people today might reach 200 people tomorrow. An email list is an owned channel. The 80 percent of leads who do not convert on first contact can be reached again through email follow up. On social media those same people are gone permanently after the first scroll.
    6. The niche is chosen too broadly. Most beginners try to compete in the broad “make money online” or “digital marketing” space. These niches are dominated by established sites with years of authority. Generalists are ignored but specialists are rewarded. A specific solution for a specific problem in a specific context outperforms broad content for a new site every time.
    7. Income timeline expectations are wrong. Affiliate marketing typically takes six to twenty-four months of consistent effort before meaningful income develops. Most beginners measure success at the three month mark and conclude the model does not work. The model works. The timeline expectation does not match reality.
    8. The technical infrastructure is skipped entirely. In 2026 sending business email from a free Gmail address means your follow up sequence lands in spam. No authentication means no deliverability. No deliverability means no conversions regardless of how good the content is. The infrastructure cost to fix this is $39.07 per year. Most beginners do not know it is required.

    How Affiliate Marketing Actually Works. The Three Pillar Affiliate System

    Most affiliate marketing advice focuses on one thing at a time. Write better content. Pick a better niche. Use better headlines. This advice is not wrong but it treats each element as independent when in reality they only work when connected.

    The Three Pillar Affiliate System is the framework that connects them. It has three components and all three must be in place for the system to function. A weakness in any single pillar limits the output of the entire system regardless of how strong the other two are.

    [TABLE: The Three Pillar Affiliate System] Pillar, What It Is, What It Does, What Breaks Without It Attention, Content and traffic, Gets the right people to find you, Nobody sees the offer Direction, Bridge page and email capture, Converts visitors into leads you can follow up with, Traffic leaves permanently with no way to reconnect Trust, Email sequence and consistent value, Converts leads into buyers over time, Leads go cold and never purchase


    Pillar 1: Attention, Getting the Right People to Find You

    Attention is how people discover your content. This includes organic search through articles and YouTube, short form video on TikTok and Instagram Reels, and community platforms like Reddit and Facebook groups.

    The critical distinction that most beginners miss is the difference between attention and targeted attention. Content that attracts general interest may generate visits but rarely converts into revenue. Affiliate marketing works best when content targets users who are already evaluating products or solutions.

    When I built EasyGamerSetups.com I generated 93,000 impressions in 28 days. That is real targeted attention from people searching for specific PC gaming solutions. Those readers had a problem and were looking for a solution. That is the right kind of attention.

    The wrong kind of attention is content designed to go viral or reach a broad audience. A million views from people who have no connection to your niche produce fewer conversions than 1,000 views from people who are actively searching for what you document.

    For AffiliateTacticHive the attention pillar is built through articles documenting real tool setups, honest reviews, and step by step guides for Systeme.io, Hostinger. Every piece of content targets a specific search query from someone who is already in the process of building an online business.


    Pillar 2: Direction, Where You Send People After They Find You

    Direction is the most skipped pillar in affiliate marketing and the one responsible for most beginner failures.

    When I had 93,000 impressions on EasyGamerSetups.com there was no direction in place. Readers arrived, read an article, and left. Some clicked affiliate links directly. Most did not buy on the first visit. Because there was no email capture, those readers were gone permanently. No way to follow up. No way to build on the attention already earned.

    Direction solves this with a bridge page.

    A bridge page is a simple landing page that sits between your content and the affiliate offer. Instead of sending readers directly to a product sales page, you send them to a page that offers something specific and valuable in exchange for their email address. This is called a Micro-Win.

    A Micro-Win is a small, specific, immediately useful resource that solves one clear problem. For AffiliateTacticHive that looks like:

    A one page Systeme.io account setup checklist covering the four priority settings before building. A DNS configuration reference card for connecting Hostinger to Systeme.io. A five step email authentication checklist for getting out of the spam folder.

    The Micro-Win does two things simultaneously. It delivers immediate value to the reader, which builds trust before any purchase is requested. And it captures the email address, which converts a one time visitor into a lead you can follow up with through email.

    The bridge page acts as a shock absorber transitioning the user from a state of idle scrolling to a state of focused learning. By providing a Micro-Win you are not just a random person with a link. You are a problem solver who has already provided value.

    How do affiliate programs work in this context: the reader opts in for the Micro-Win, enters the email sequence, receives value, and is introduced to the affiliate offer as the natural next step toward the result they are already working toward. The commission is earned not because a link was clicked but because trust was built first.


    Pillar 3: Trust, Why People Buy From You Specifically

    Research shows that 80 percent of leads never convert on first contact. That means 80 out of every 100 people who opt in for your Micro-Win will not buy the first time they see your affiliate offer. This is not a failure. It is normal buyer behaviour.

    Trust is built through the follow up sequence that runs after someone opts in. This is an automated email series that delivers value, addresses objections, and introduces the affiliate offer over a series of days.

    The sequence David uses on AffiliateTacticHive follows this structure:

    Email 1, Delivery. Send the Micro-Win resource immediately. Confirm what they signed up for and what is coming next. No selling in this email.

    Email 2, The Logic. Explain why the problem they have exists and what the correct solution looks like. Connect the logic to the tool or course being promoted without making it a pitch.

    Email 3, The Proof. Share specific documented experience. For AffiliateTacticHive this means the real setup process, what went wrong, what was fixed, and what the outcome was. Specific details here are what separate trusted recommendations from generic affiliate content.

    Email 4, The Objections. Address the most common reasons people hesitate. Cost, complexity, whether it will work for their specific situation. Answer these directly and without hype.

    Email 5, The Offer. Introduce the affiliate product clearly with a specific reason to act now. This could be a limited period bonus, a price change, or simply a clear deadline on the follow up sequence.

    This sequence runs automatically through Systeme.io. Once built it works while you are offline, handling the three things that stop people from buying: distraction, confusion, and skepticism.


    The Tech Stack Behind The Three Pillar Affiliate System

    The system described above does not require five different platforms. It requires two.

    [TABLE: The Lean Launch Stack for Affiliate Marketing] Platform, Role in the System, Cost Hostinger, Domain registration and business email. Provides the authenticated sending identity required for emails to reach inboxes., $39.07 per year (domain plus email) Systeme.io, Everything else. Bridge pages, email capture, automation sequences, affiliate link management, and payment processing if selling digital products., $0 on the free plan

    This is The Lean Launch Stack. It covers all three pillars of The Three Pillar Affiliate System at a total first year cost of $39.07. No separate funnel builder. No standalone email platform. No link tracker. No course hosting tool paid for separately.

    [TABLE: The Lean Launch Stack vs The Feature Trap for Affiliate Marketing] Comparison Point, The Lean Launch Stack, The Feature Trap Monthly cost, $0 after the $39.07 year one investment, $150 to $200 minimum Platforms to manage, 2, 5 or more Email authentication included, Yes via Hostinger Business Email, Depends on configuration Funnel builder included, Yes via Systeme.io, Paid separately Email automation included, Yes via Systeme.io, Paid separately Data connected across funnels and email, Yes, everything in one platform, No, requires integration tools like Zapier Time to set up, One evening following the setup guides, Days to weeks connecting disconnected tools

    The Feature Trap is not caused by bad decisions. It is caused by solving confusion with purchases instead of with clarity. Every tool added before the core system is validated adds complexity and cost without solving the underlying problem.


    How to Find Your Specific Angle in 2026

    The broad affiliate marketing niche is competitive. The specific solution niche is not.

    In 2026 the sites that rank and convert are not trying to cover everything. They are the most useful resource for one specific type of person with one specific problem. The broad make money online niche is saturated. But the specific solution niche is wide open.

    Here is the process for finding a specific angle that is realistic to compete for as a new site.

    1. Identify one technical problem you have personally solved. Not a problem you read about. A problem you encountered, worked through, and fixed. The documentation of that process is the foundation of your content.
    2. Connect the solution to a tool that solved it. The tool becomes the affiliate product. The documentation of the solution becomes the content. The person searching for the same problem becomes the audience.
    3. Build the Micro-Win around that specific solution. A checklist, a reference guide, or a short video walkthrough of the exact fix. This is your bridge page lead magnet.
    4. Create the email sequence that follows up on the Micro-Win with more depth. Each email goes one level deeper into the solution and one step closer to the tool that makes it easier.

    This is exactly the model AffiliateTacticHive documents. Every article covers a specific technical setup problem, connects it to a real tool, and routes readers into a system that follows up with more value.


    Frequently Asked Questions

    How does affiliate marketing work for beginners?

    Affiliate marketing works by earning a commission when someone purchases a product through your unique tracking link. As a beginner the practical process is: create content that attracts people searching for a specific solution, offer a free resource in exchange for their email address, follow up with value through an automated email sequence, and introduce the affiliate product as the natural solution to the problem your content addresses. The link is the last step, not the first.

    How do affiliate links work technically?

    An affiliate link is a unique URL containing your affiliate ID. When someone clicks the link a cookie is stored in their browser that tracks the referral back to your account. If that person completes a purchase within the cookie window, typically 30 to 90 days depending on the program, the sale is attributed to you and you earn the commission. The tracking happens automatically through the affiliate network’s system.

    How do affiliate programs work?

    An affiliate program is an arrangement where a company pays a commission to people who refer customers. You apply to join the program, receive a unique affiliate link, and promote the product through your content. When someone purchases through your link the company tracks the sale and pays your commission either directly or through an affiliate network that manages the relationship.

    Do I need a website to do affiliate marketing?

    Not necessarily. You can use platforms like Systeme.io to build a bridge page and run an email sequence without a full website. What you do need is a custom domain for professional email authentication and a place to send traffic that captures email addresses. A single landing page connected to your domain is enough to start. A full website becomes relevant when you want to build organic search traffic through articles and blog content.

    How much does it cost to start affiliate marketing?

    The minimum viable cost for a functional affiliate marketing system in 2026 is $39.07 for the first year. That covers a custom domain at $19.99 and Hostinger Business Email at $19.08. Systeme.io’s free plan handles bridge pages, email capture, and automation at no cost. The full cost breakdown is covered in the startup cost guide linked in Section 8.

    How long does affiliate marketing take to work?

    Most affiliates see their first meaningful results between six and twenty-four months after starting consistently. The timeline depends on content volume, niche specificity, and whether the full three pillar system is in place from the start. Beginners who skip email capture and follow up sequences extend their timeline significantly because they are not building an owned audience that compounds over time.

    Can I do affiliate marketing without social media?

    Yes. Organic search through articles is a slower build but produces compounding traffic that does not depend on platform algorithms. The EasyGamerSetups.com case generated 93,000 impressions and 214 clicks in 28 days entirely through organic search with no social media promotion. The limitation of search only traffic is that it takes three to six months before articles begin ranking. A combination of search and one social platform accelerates the early stage.

    What is a bridge page in affiliate marketing?

    A bridge page is a landing page that sits between your content and the affiliate offer. Instead of sending readers directly to a product sales page you send them to a page that offers something specific and useful in exchange for their email address. The bridge page captures the lead, delivers immediate value, and begins the trust building process that converts readers into buyers through the follow up email sequence.

    Why are my affiliate links not converting?

    The most common reasons affiliate links do not convert are: sending traffic directly to a sales page without an intermediate email capture step, no follow up sequence in place for the 80 percent of leads who do not buy on first contact, content that attracts general interest rather than readers who are actively evaluating a purchase, and email deliverability problems caused by missing authentication records. The Three Pillar Affiliate System addresses all four.

    What is the difference between an affiliate network and an affiliate program?

    An affiliate program is run directly by the company whose products you promote. An affiliate network is a third party platform that hosts multiple affiliate programs in one place. Networks like ShareASale, CJ Affiliate, and Impact handle tracking, reporting, and commission payments across many programs simultaneously. Direct programs like Systeme.io and Hostinger manage their own tracking and pay affiliates directly without a network intermediary.


    Related Guides

    These articles cover the specific setup steps for building The Three Pillar Affiliate System on AffiliateTacticHive.

    How Much Does It Cost to Start an Online Business in 2026?

    What it covers: The complete first year cost breakdown for a digital or affiliate business, why the $39.07 infrastructure cost is non-negotiable, and the full comparison between The Lean Launch Stack and the Feature Trap.

    Systeme.io Review: Is It Worth It for Beginners in 2026?

    What it covers: Full review of Systeme.io including free plan limits, what it does well, where it falls short, and whether it is the right platform for building the Direction and Trust pillars of The Three Pillar Affiliate System.

    Hostinger Review: Is It the Right Foundation for an Online Business in 2026?

    What it covers: Full review of Hostinger including domain registration, business email, WordPress hosting, and how it provides the authenticated sending identity required for the Trust pillar to function.


    Section 9: The System Is the Business

    Affiliate marketing is not broken. It is taught backwards.

    Most beginners are shown the outcome first: commissions, passive income, financial freedom. Then they are shown the tactic: get a link, post content, earn money. What they are almost never shown is the system that connects attention to direction to trust in a way that produces consistent results.

    The Three Pillar Affiliate System is not a complicated framework. It is three things working together. Content that attracts the right people. A bridge page that captures their email address. A follow up sequence that builds trust and introduces the offer at the right moment.

    Without all three in place, the system does not function regardless of how good any individual component is. With all three in place, the system works while you are offline, compounds over time, and produces results that scale without requiring more hours.

    I work full time in construction. I documented 93,000 impressions in 28 days on a site built part time. That traffic produced no affiliate revenue because the Direction and Trust pillars were not in place. Building those two pillars on top of the attention already earned is exactly what AffiliateTacticHive documents in real time.

    The setup guides in Section 8 cover every step. Work through them in order and the system will be connected before you publish your first piece of content.

  • Hostinger Review 2026: Is It Worth It for Beginners?

    Is Hostinger Good in 2026? The Short Answer

    Yes. Hostinger is one of the best starting points in 2026 for beginners who want to launch a website, connect a domain, and keep costs under control without stacking a bunch of separate tools. That does not mean Hostinger is the most advanced option, it means Hostinger solves a problem most beginners do not realize they have yet: technical fragmentation.

    Instead of managing hosting in one place, domains in another, email somewhere else, and website setup on top of that, Hostinger gives you a simpler starting point. For someone trying to build something real without drowning in setup decisions, that matters more than having the most powerful dashboard on the market.


    What Hostinger Actually Is

    Hostinger is not just a hosting company in the old-school sense. In practice, Hostinger is a platform that lets you manage the basic infrastructure of an online business from one place.

    That includes:

    • website hosting
    • domain management
    • DNS settings
    • business email
    • website builder tools
    • entry-level email marketing tools
    • AI-assisted setup features

    That bundle is what makes Hostinger relevant in 2026. A lot of reviews still talk about hosting like the only question is uptime or server speed. That matters, but it is not the first problem most beginners need solved. The first problem is usually this:

    How do I get everything connected without turning my setup into a mess? That is where Hostinger makes sense.


    The Real Reason Hostinger Works for Beginners

    Most people do not get stuck because they picked the wrong platform, they get stuck because they added too many tools too early that is the part most Hostinger reviews miss.

    Hostinger is useful because it reduces tool fatigue. It lowers the number of decisions you have to make before you can get something live. That is a much bigger advantage than people give it credit for.

    A beginner does not usually need:

    • the fastest premium host on the internet
    • the most advanced developer controls
    • a complicated external stack

    A beginner usually needs:

    • a site
    • a domain
    • email
    • the ability to manage settings without breaking things

    Hostinger gives you that in one place.

    That is not flashy, but it is practical.


    What You Can Actually Do With Hostinger

    The simplest way to think about Hostinger is this: it covers the foundation layer.

    You can use Hostinger to:

    • register and manage a domain
    • host a WordPress website
    • build a website with its drag-and-drop builder
    • create business email accounts
    • manage DNS records
    • connect external tools and platforms
    • run basic email marketing

    That last part matters more than it used to.

    If you are starting a site, building a simple online business, or trying to avoid unnecessary monthly subscriptions, having email and hosting under one roof can save both money and friction.

    Hostinger is not trying to be everything. But it is trying to remove the chaos that comes from using five different beginner tools that do not connect cleanly.


    The hPanel Advantage

    One of the biggest reasons Hostinger feels easier than older hosts is its custom dashboard, hPanel.

    This matters because a lot of beginner frustration has nothing to do with business strategy and everything to do with interface confusion. Traditional control panels can feel outdated, cluttered, and overly technical. hPanel is still a control panel, but it is cleaner and easier to navigate.

    That makes a difference when you need to:

    • update DNS records
    • connect a domain
    • set up email
    • install WordPress
    • manage websites

    That does not make Hostinger “better” for every user. It makes Hostinger easier to use for the people most likely to feel overwhelmed by setup.


    Pricing: What You Need to Understand Before Buying

    Hostinger is known for low entry pricing, and that is one of the main reasons people look at it. That said, the headline price is not the full story. Like most hosting companies, Hostinger uses promotional pricing to get you in, then renewal pricing increases later. That is not unique to Hostinger, but it is something you need to factor into the decision.

    The good news is that even with renewal pricing, Hostinger can still make financial sense if it replaces other tools you would otherwise pay for separately. That is the real comparison.

    The wrong way to compare Hostinger is:

    • “Is this cheaper than one random host?”

    The better question is:

    • “Does this reduce my total system cost?”

    If Hostinger handles your hosting, domain management, site setup, and part of your email stack, the total cost can still stay lower than building a disconnected beginner setup from scratch.

    Setup TypeWhat You GetStarting Price (Promo)Renewal RangeWho This Is For
    Domain Only1 domain name (e.g., .com)~$9–$12/year~$12–$18/yearIf you just want to secure a name
    Domain + Professional EmailDomain + business email (yourname@domain.com)~$1.59–$2.99/month~$2.99–$5.99/monthIf you want credibility without a full site
    Domain + Website (Hosting)Domain + hosting + website builder/WordPress~$2.99–$3.99/month~$6.99–$11.99/monthBest for beginners building a real system

    The Hidden Cost Most Beginners Ignore

    Most beginners do not overspend because they are reckless. They overspend because they are trying to solve confusion.

    Here is what usually happens:

    They buy hosting, then they buy an email tool and a website builder, then maybe a funnel tool, then add another plugin or service because someone said they “need” it.

    Now they are paying a lot more than expected, and their setup is still messy, this is where Hostinger has real value. This platform can replace part of that early-stage stack.

    That does not mean it replaces every tool forever. It means it helps you avoid building a fragile, overpriced system before you even understand what you are trying to build.


    Hostinger Email and Marketing Tools: What They Actually Replace

    This is one of the more underrated parts of the platform.

    Hostinger now includes more than basic inbox hosting. Depending on what you choose, it also offers business email and email marketing features that let beginners keep more of their setup in one place.

    For a beginner, this can mean not having to immediately pay for:

    • Mailchimp
    • ConvertKit
    • another standalone email platform

    That does not mean Hostinger’s email tools are better than every dedicated email service. It means they can be enough early on, and “enough” matters.

    If something is enough to help you:

    • start building a list
    • send follow-up emails
    • launch simple campaigns
    • avoid another monthly subscription

    then it has done its job, that is a much more useful standard than asking whether it competes feature-for-feature with tools built only for email marketing.


    What Hostinger Is Best For

    Hostinger makes the most sense if you are in one of these situations:

    • you are launching your first website
    • you want to keep your setup simple
    • you need domain, hosting, and email in one place
    • you are building a basic blog, niche site, or small business site
    • you do not want to spend your first month comparing tools instead of building

    This is also why Hostinger fits well with your overall system if you are using something like Systeme.io for funnels and automation.

    Hostinger can handle the foundation:

    • the domain
    • the site
    • the DNS
    • the email identity

    Then your funnel platform can handle the system layer, that is a much cleaner setup than trying to force one platform to do everything badly.


    Where Hostinger Falls Short

    Hostinger is not perfect, and pretending it is would weaken the review.

    Hostinger is probably not the right choice if:

    • you need very advanced server control
    • you are running a large, complex application
    • you care more about fine-tuned performance than ease of use
    • you already know exactly what your stack should be

    There are faster or more customizable options, there are also premium hosts with stronger high-end performance reputations. That said, a platform can be slightly less powerful and still be the better choice for a beginner that is the point a lot of reviews miss.

    A more advanced host is not automatically a better host for someone who still needs to get their first working system live.


    Hostinger vs Premium Alternatives

    This is the unpopular opinion section. Hostinger is often the better starting choice even if a premium host is technically stronger.

    Why?

    Because most beginners do not need 5% more speed as much as they need 50% less friction. That tradeoff is worth understanding. If your site never launches because the stack became too confusing, then all the extra performance in the world did not help.

    Execution beats theoretical optimization at the beginning. That does not mean performance does not matter. It means simplicity has ROI too.


    Final Verdict

    Hostinger is not the most advanced platform in 2026, it is one of the most practical, that is why it works.

    Hostinger is a strong choice for beginners because it reduces technical fragmentation, lowers early setup friction, and keeps more of the core foundation in one place. It gives you a cleaner way to launch a site, manage a domain, and set up email without building a disconnected stack too early.

    If your goal is to build something simple, real, and sustainable, Hostinger makes sense, If your goal is to create a highly customized technical environment from day one, it probably does not.

    That is the real answer.


    FAQ

    Is Hostinger good for beginners in 2026?

    Yes. Hostinger is one of the better beginner options because it combines hosting, domains, and core setup tools in one place.

    Is Hostinger only for websites?

    No. Hostinger also includes domain management, business email, and entry-level marketing tools depending on the plan and setup.

    Is Hostinger cheaper than using separate tools?

    Often, yes. Hostinger can lower your overall system cost by replacing some tools you would otherwise pay for separately.

    Is Hostinger the fastest hosting platform?

    Not necessarily. There are stronger premium performance options, but Hostinger often wins on simplicity, ease of use, and cost control.

    Who should skip Hostinger?

    People who need advanced developer controls, large-scale infrastructure, or highly customized hosting environments may outgrow it.